

After such a warm reception from his first Readers’ Rides article here on The Radavist, Henry from Terrapin Transportation Company is back with his ReMixt! This is a wild one, so let’s get truckin’…
Boozhoo (that’s wassup in Anishinaabemowin) folks! Henry at Terrapin Transportation Company to bring you another questionable banger again handcrafted on Turtle Island. Some people like long walks on the beach. I yearn for long peaceful excursions through the local hardware store like I’m Indians Jones on a quest for the most unthinkable material to build a frame from. Surprisingly steel at your local big name hardware store is a pretty pricey so I’m going low buck this time around.
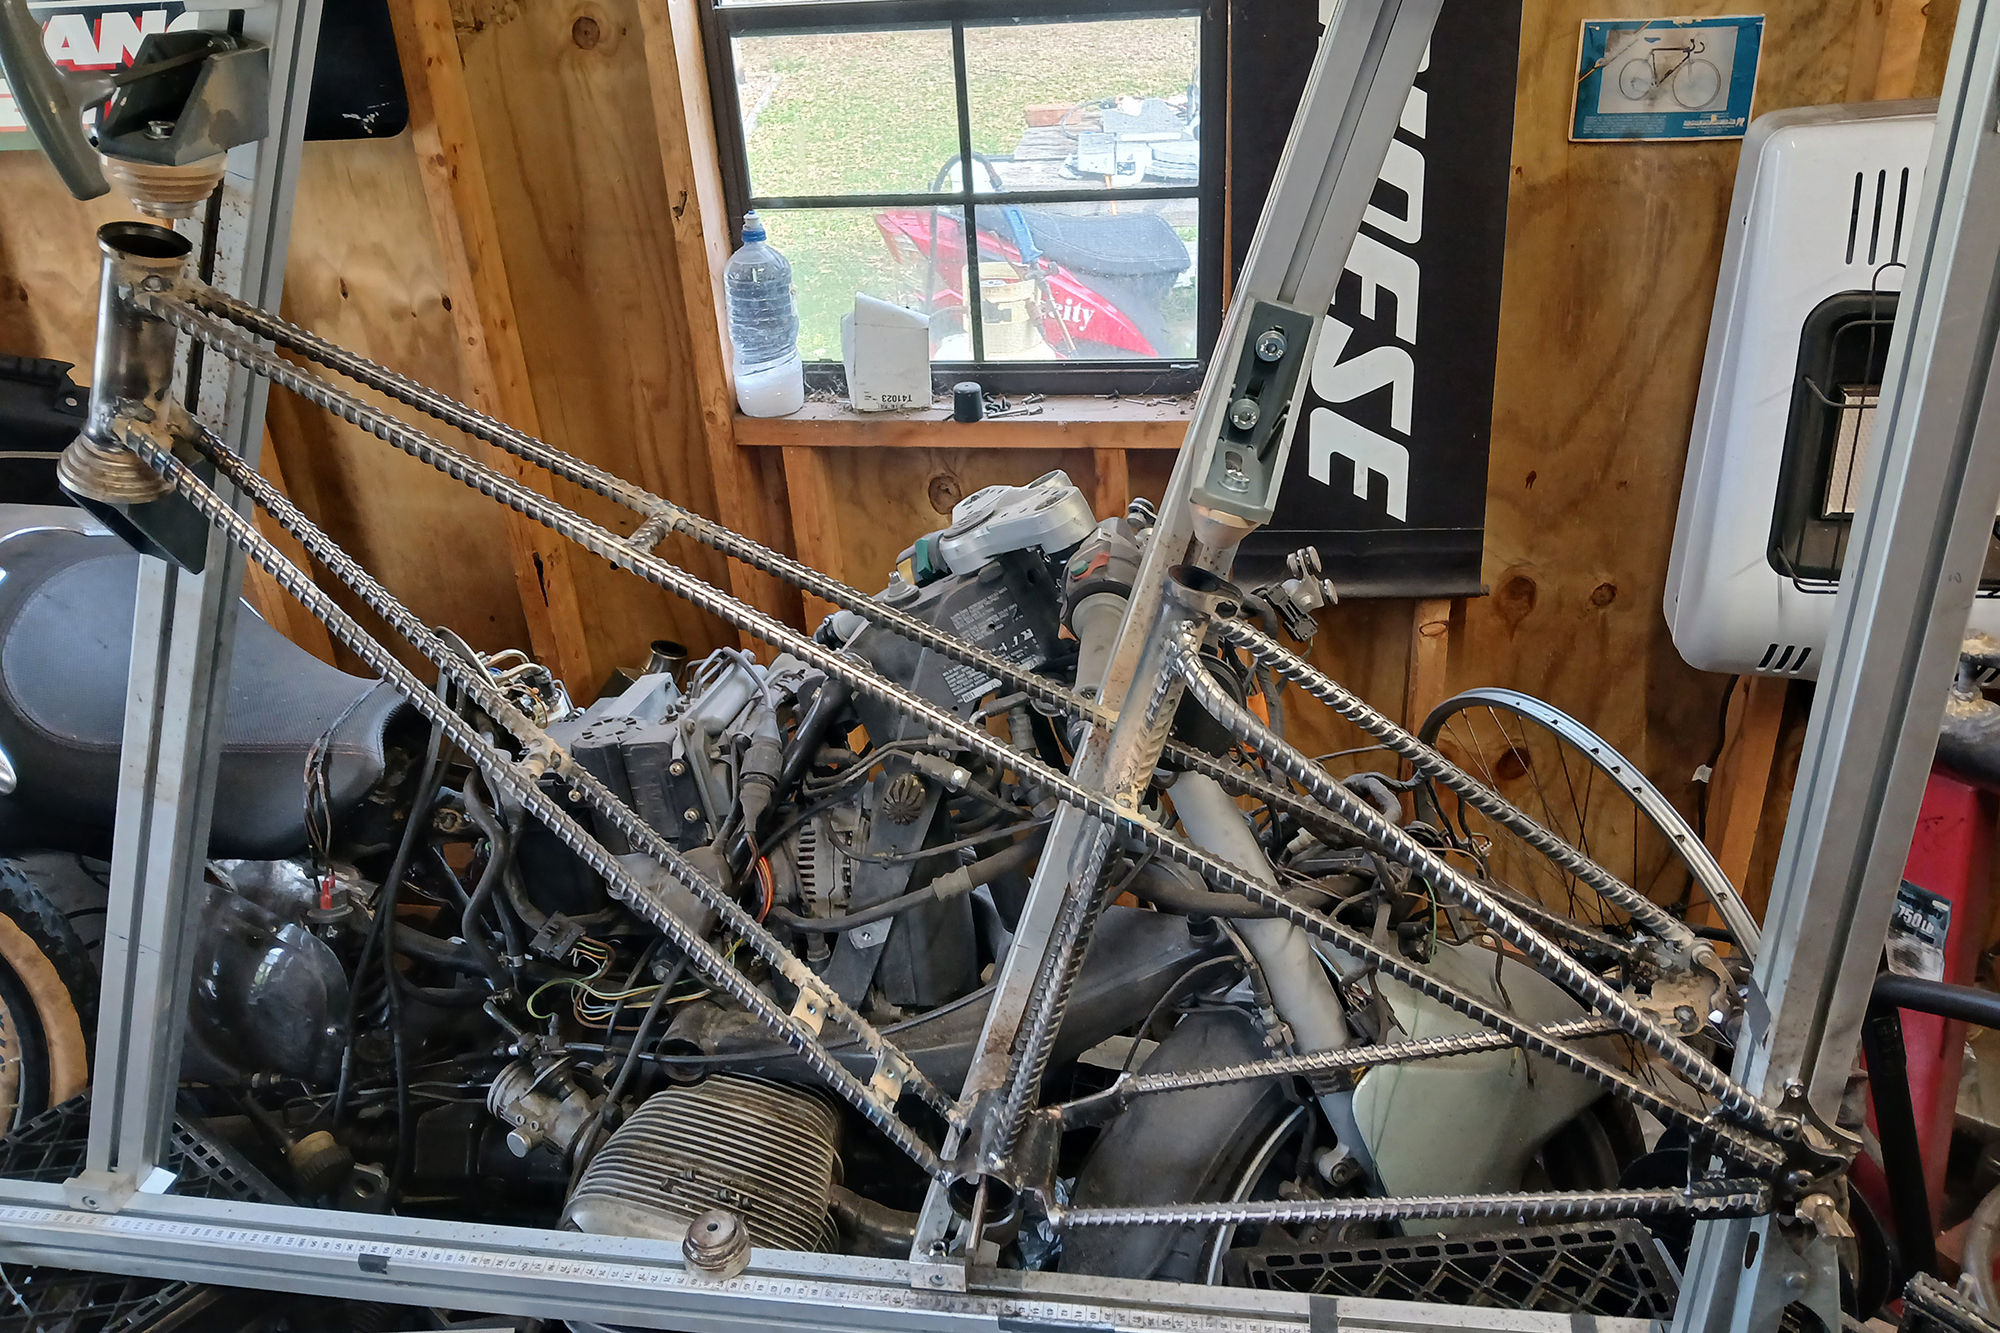
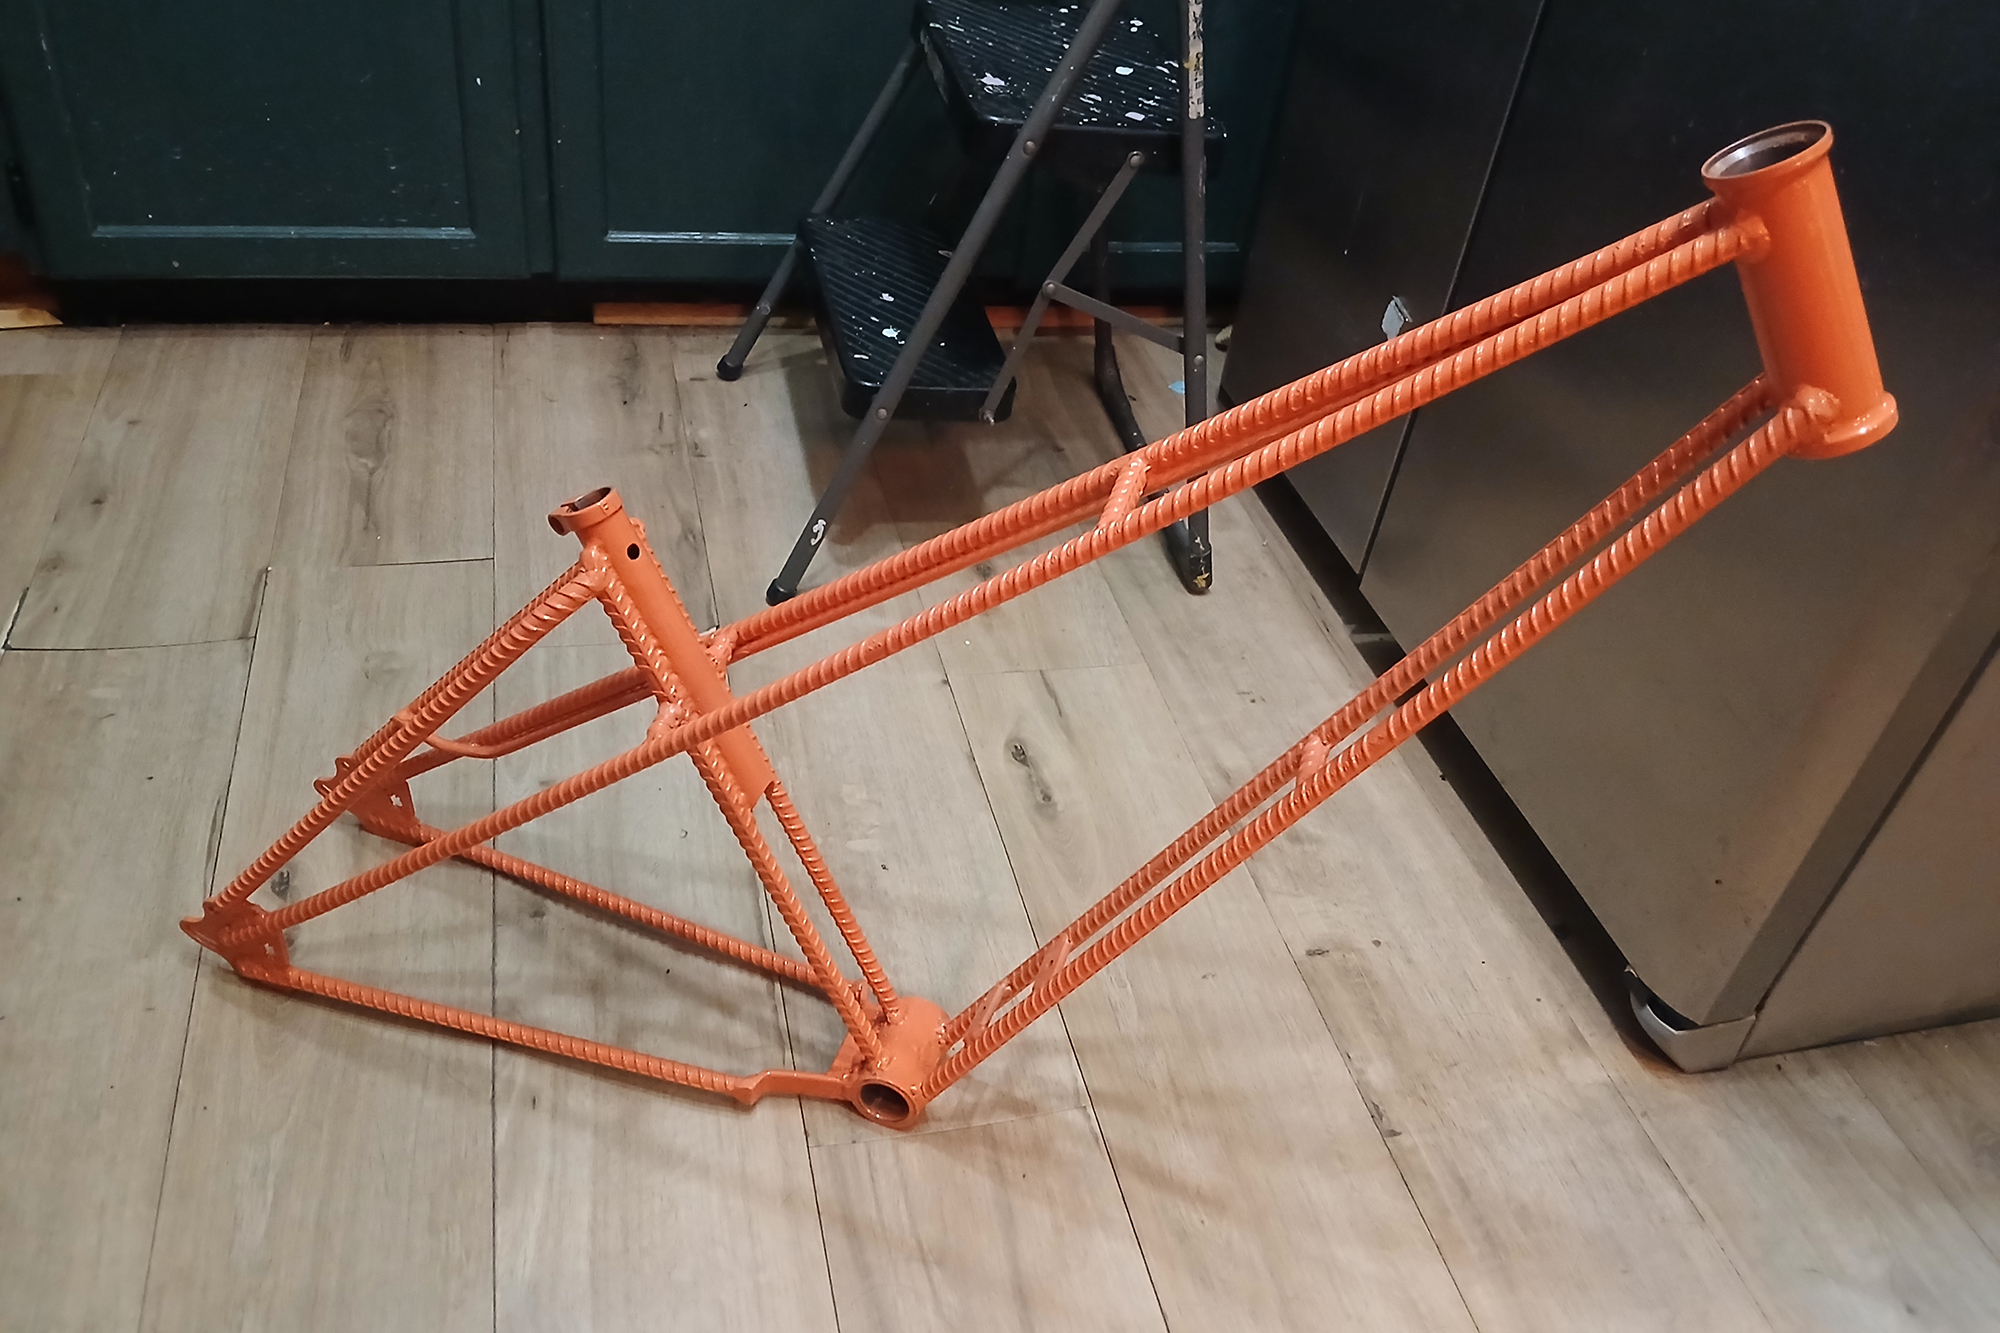
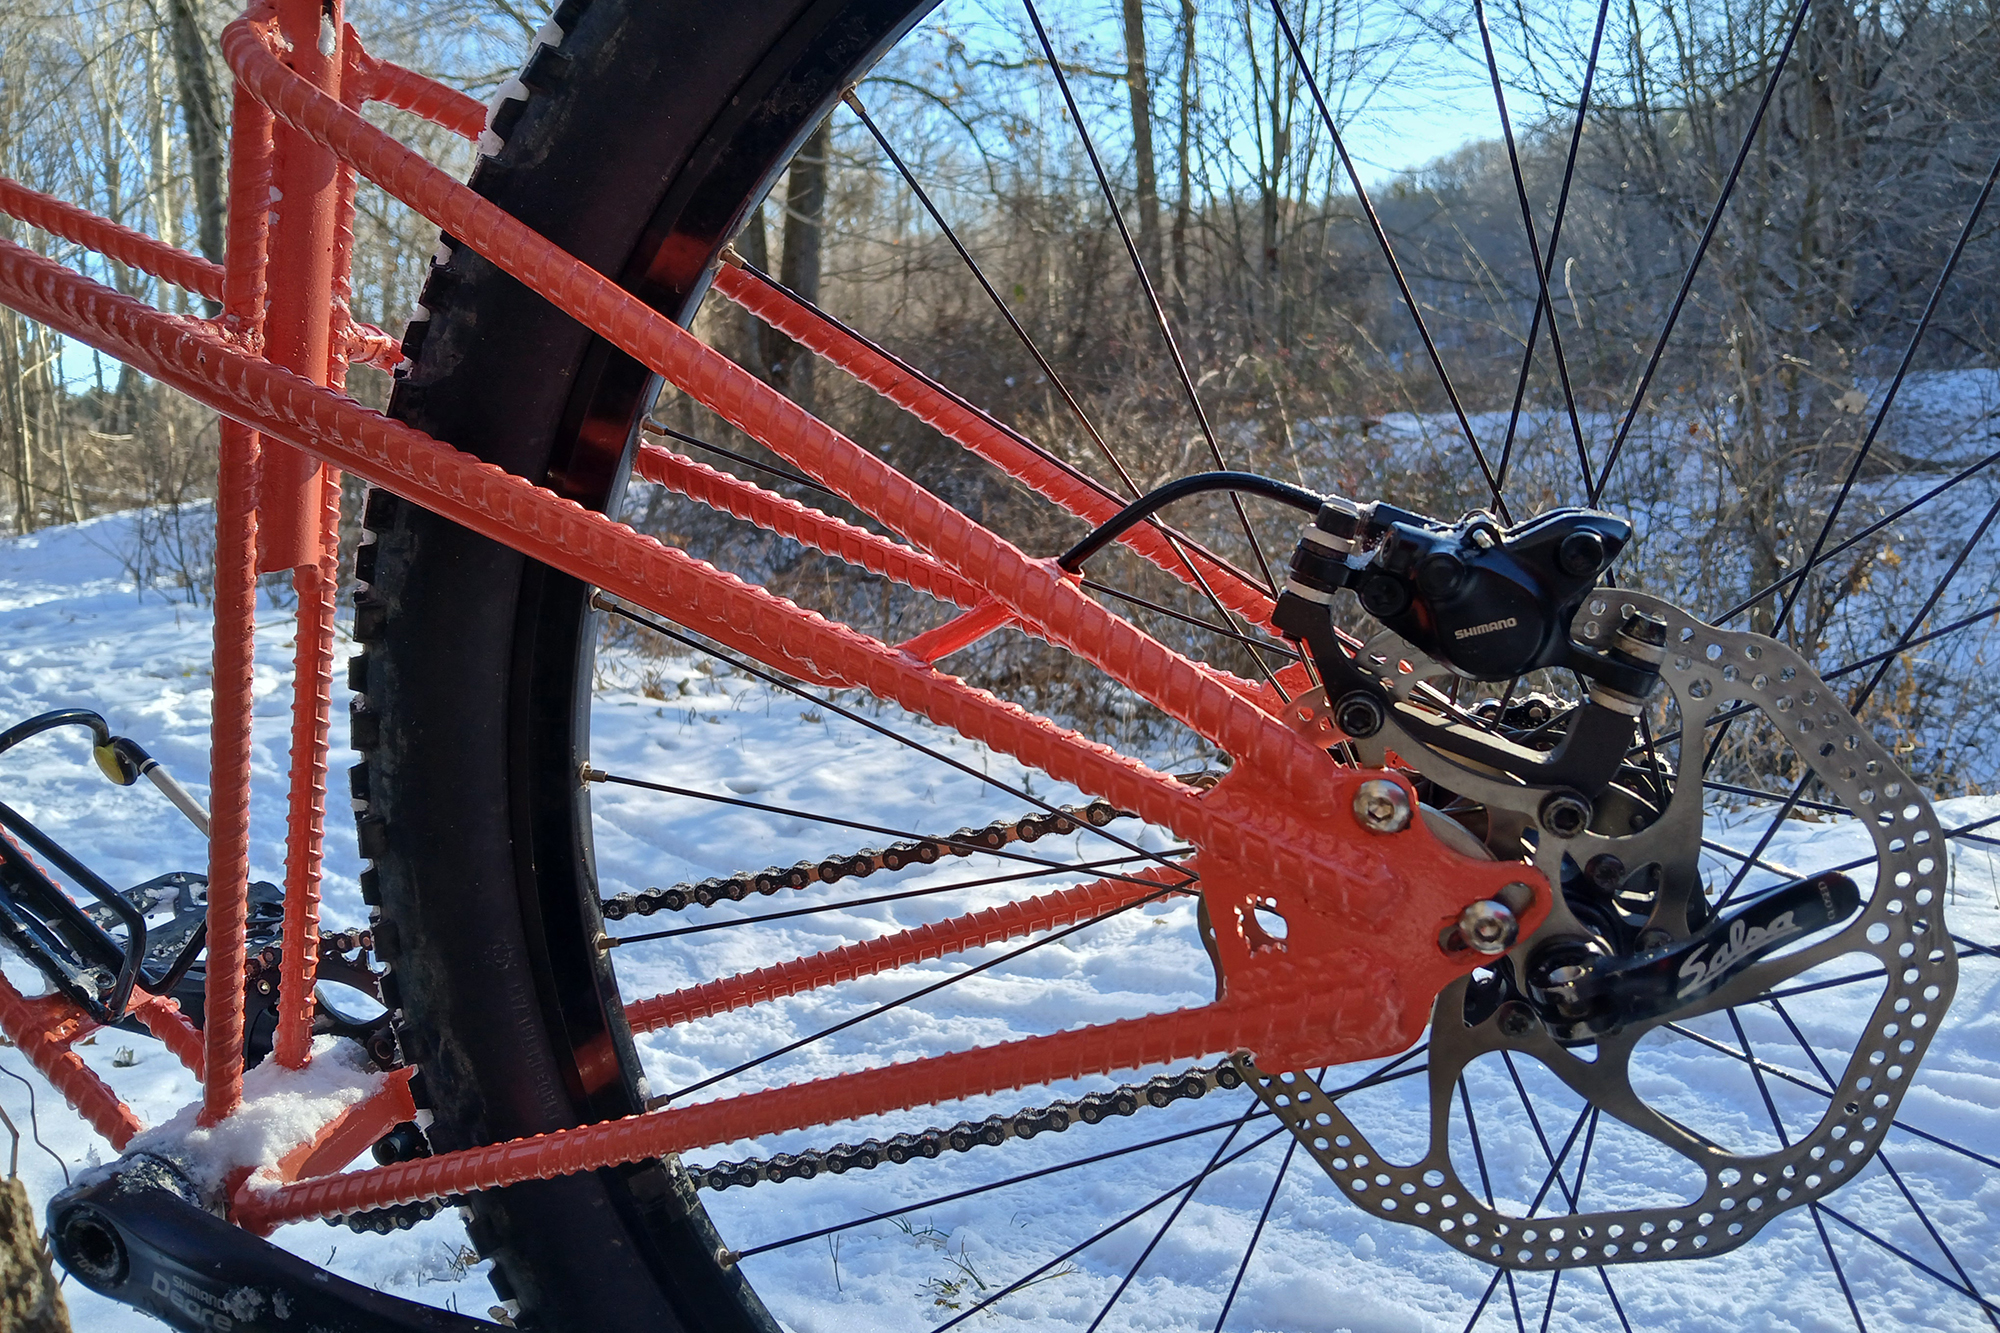
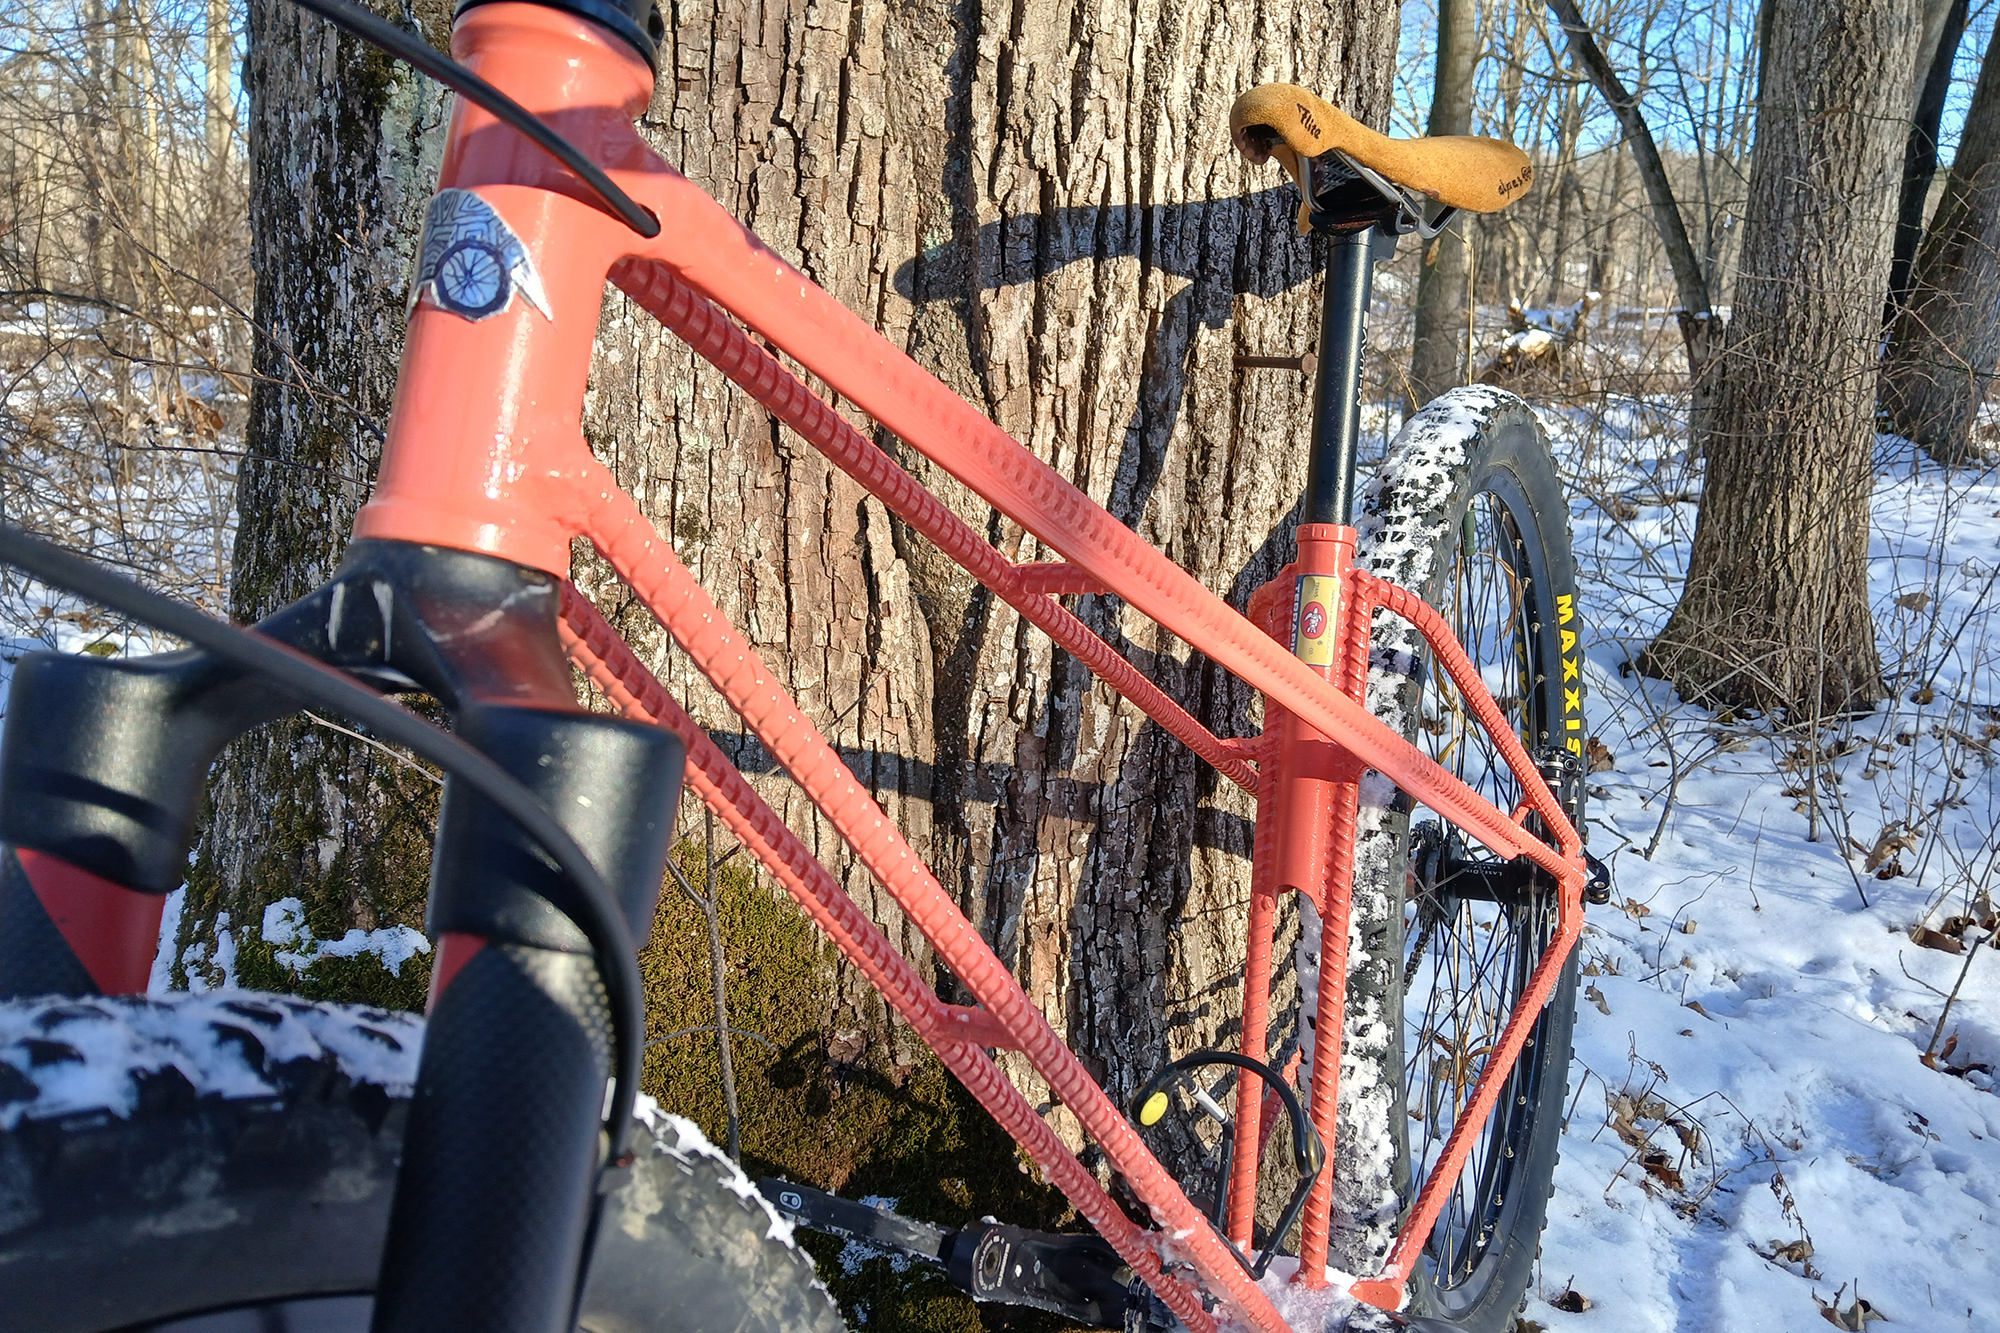
Now the crown jewel of this build…the choice of material that will essentially connect the proverbial frame dots. On my long walk through the store I figured if I’m constructing a frame I should well…use construction material. And that’s when the clouds parted and the patron saint of cyclists the Madonna del Ghisallo took control of my shopping cart like Jesus taking the wheel and guided me to the shelving of…Rebar! I almost dropped to my knees from weakness upon lifting it into the cart and then saw the price! This is truly a sign. No really it was a sign of how cheap this stuff is! Out the door for under twenty clams with twenty “ribbed for your pleasure” feet of the most contentious framebuilding material to grace my frame fixture!
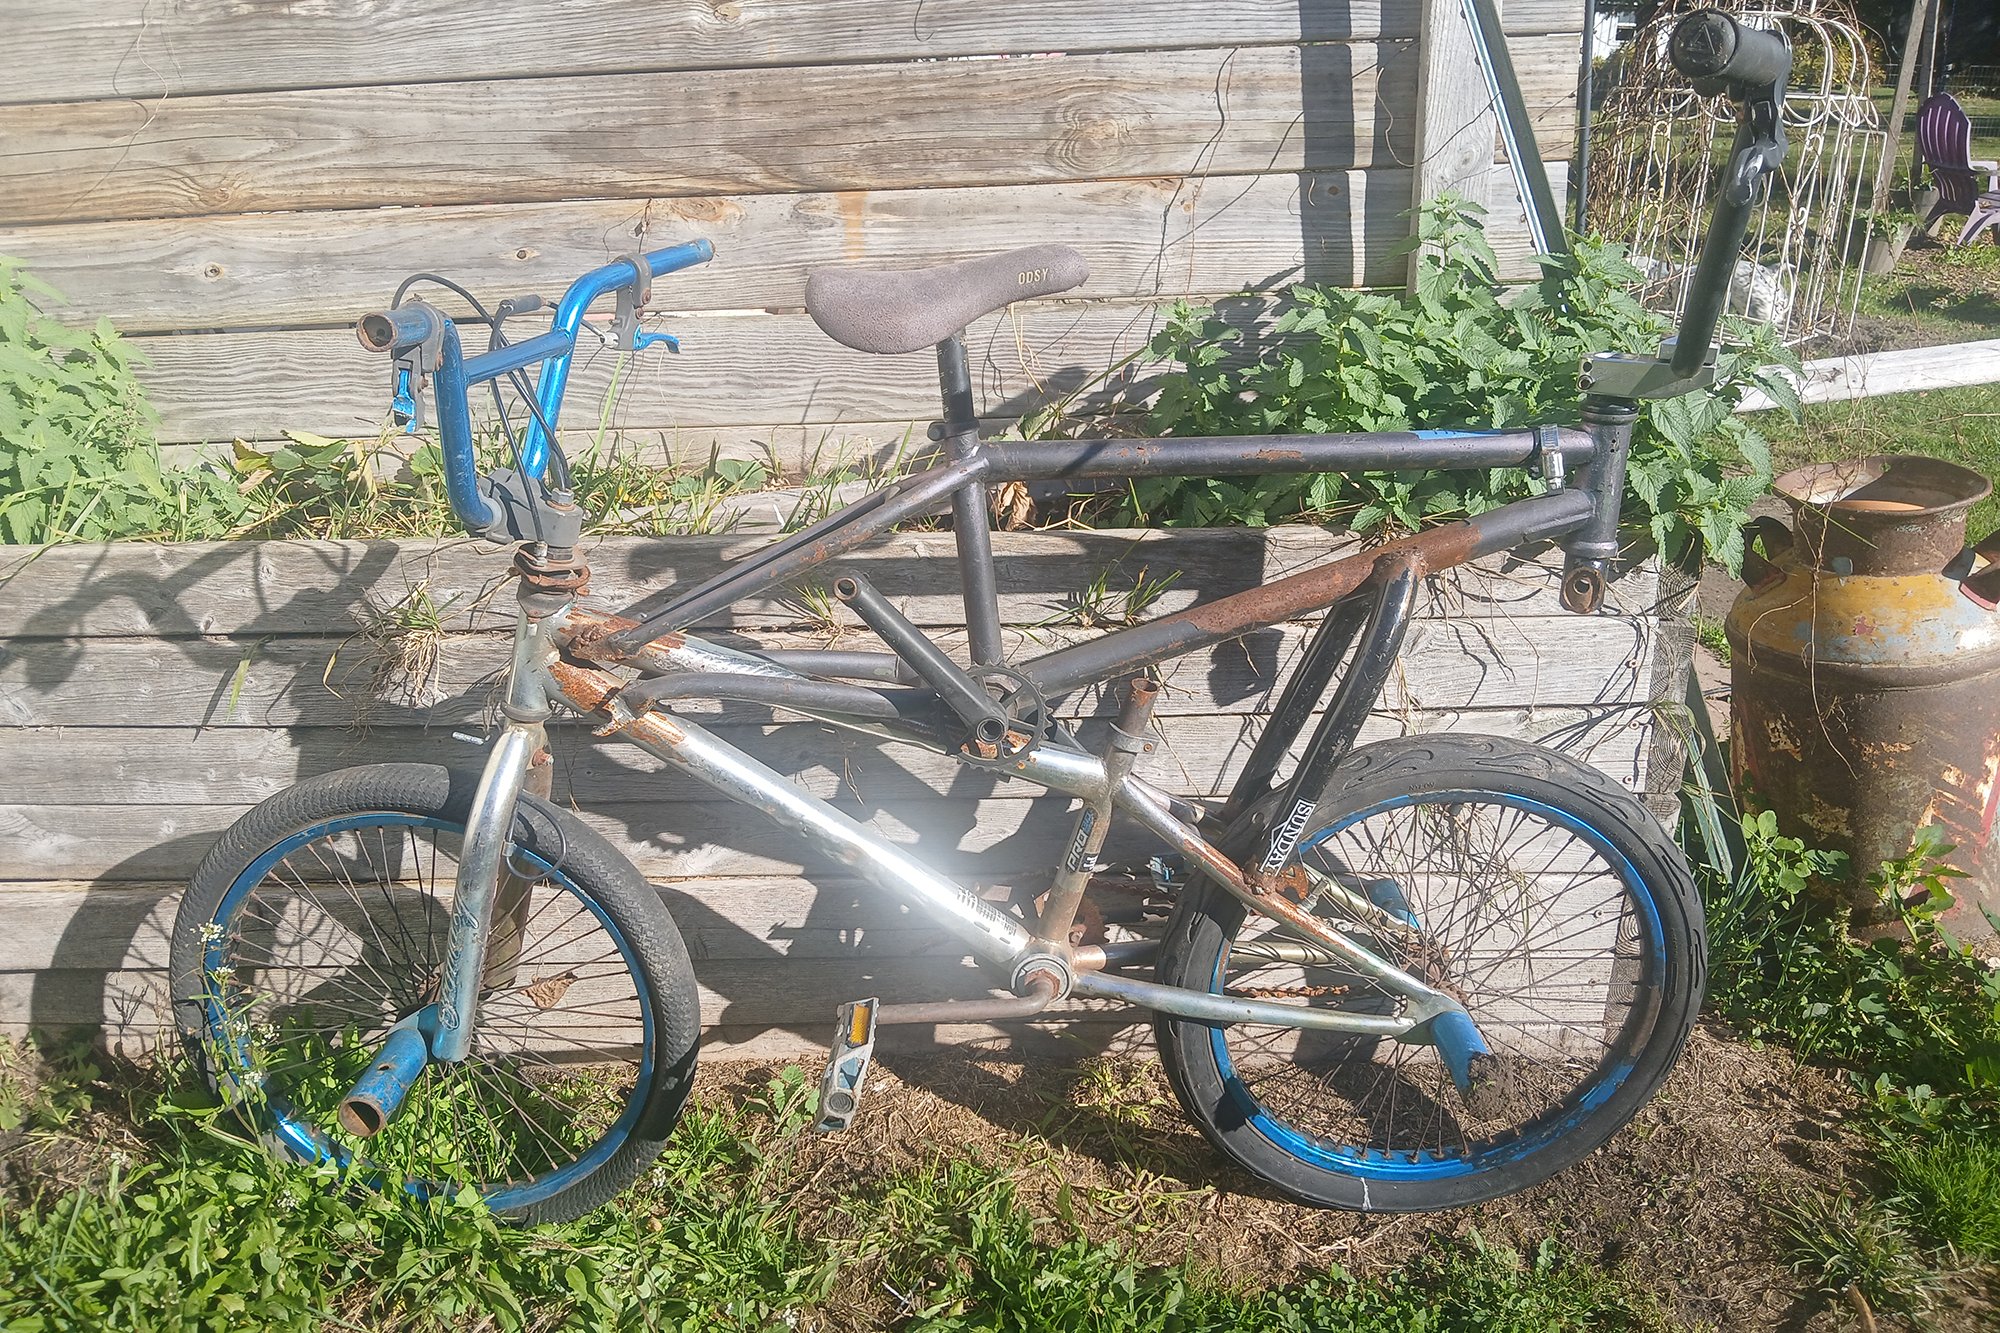
My buddy Richie…aka Stoopidtall…aka one time Guiness World Record holder tallest bike rider…and overall just a really nice dude. He let me peruse through the Detroit Freakbike Experience’s extensive collection of bikes so that I could keep this on the cheap. So I found this unfinished mini tall BMX tall bike that fit the bill. It wasn’t even a face a mother could love. I just wanted the top frame that was a newer Fit freestyle bike as it had an integrated head tube, Mid BB shell, decent cranks and stem. Once home I freed it from the depths of eternal bicycle doom so it can spread its ferrous wings to be reborn into the two wheeled Phoenix it yearned to be. I also realized this build is beginning to read like the bicycle version of Frankenstein.
Quick back story on the basis for this frame. While on our way back from vacation in Chicago this summer we stopped at a shop called Vulture Space in Milwaukee. While browsing around they had this used Surly ECR I took for a spin and fell in love but it wasn’t in my budget to drop on another bike. So when in doubt build your own! Luckily Surly still has the geo specs on the site. But since I wanted a little taller bottom bracket but not the nose bleed altitude of the “H2BS” frame featured here this summer. Plus a little slacker here and there and by the time I got done it wasn’t really an ECR clone anymore and a moreso a beast of its own.
This time even with an arsenal of full welding tanks at my disposal I’ve decided to stick with the true ethos of Terrapin Trans Co. The Mad Hatter of weld spatter…drum roll…Fluxcore! I feel it keeps things more approachable and attainable to most people who may want to try taking a stab at this. Where there’s a will there’s a way and where there’s a fluxcore welder and questionable material there’s a frame to be made is my new motto!
“The ReMixt”
(Rebar+Mixte=ReMixt…clever huh!)
So I’ve been wanting to make a mountain mixte for a while. I’ve always dug the Soma Buena Vista but you can’t put proper rubber in it so scratch that. Add in the “too broke” for a real Surly ECR. With half a day burned setting up my fixture since it has no measurement marking and strictly uses the alignment of the stars and hopes and dreams to ensure it’s correct. I felt content with my choices. With it being single speed I don’t need much for braze ons. To keep things fresh and new from the last frame’s use of common nuts as guide. I had to raise the bar for myself and keep things fresh. As much as I hate internal routing I thought it would be funny with what I call externally internal cable routing. The “outie” belly button of cable routing! Internal cable routing on solid material? What the huh? The funny thing is that one piece of fuel line I used cost as much as all the rebar for the frame.
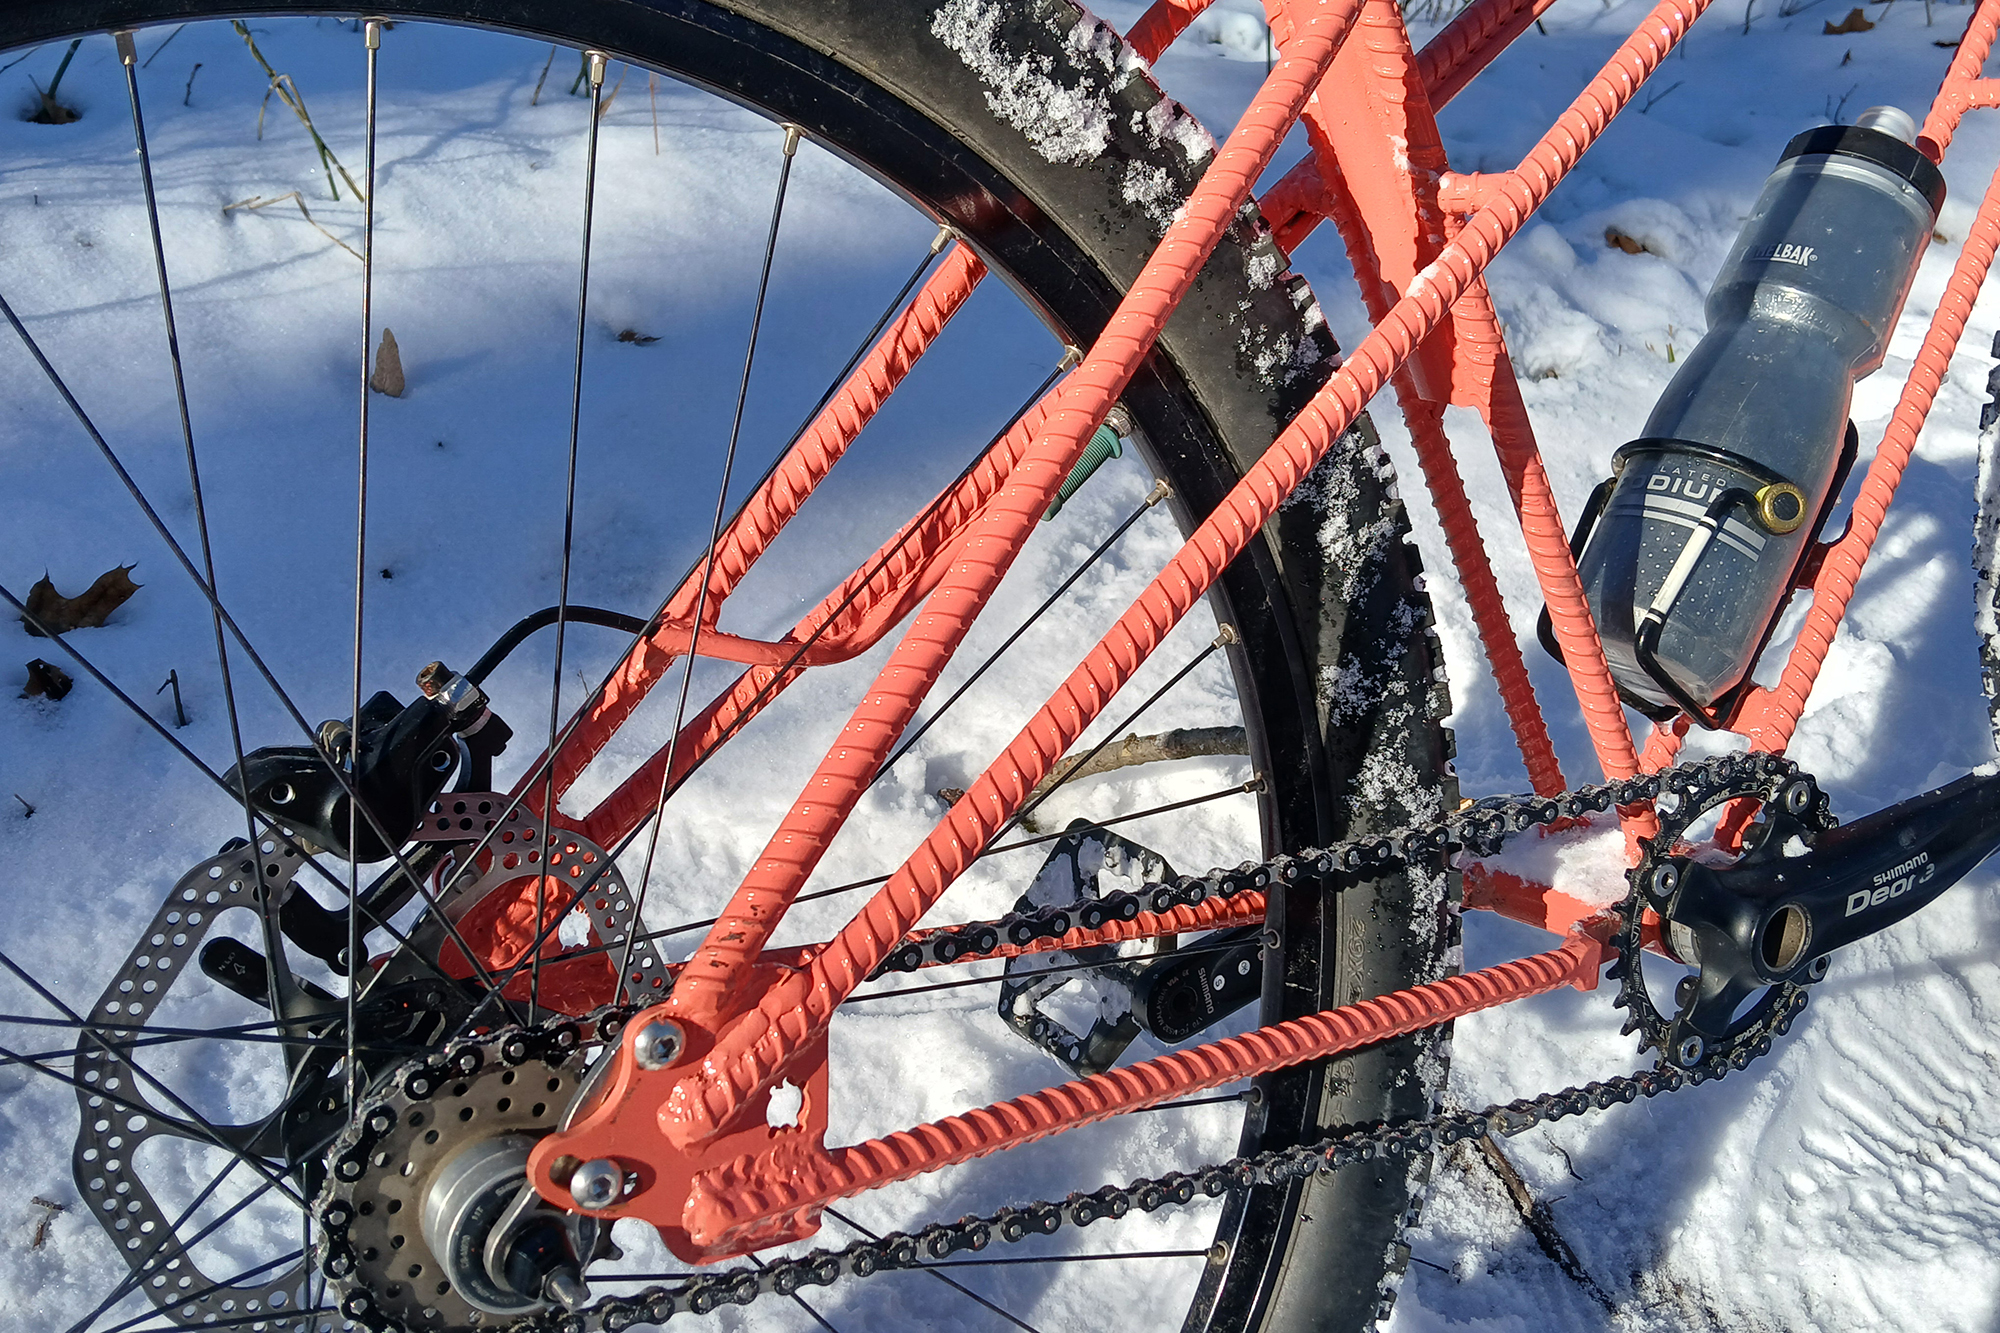
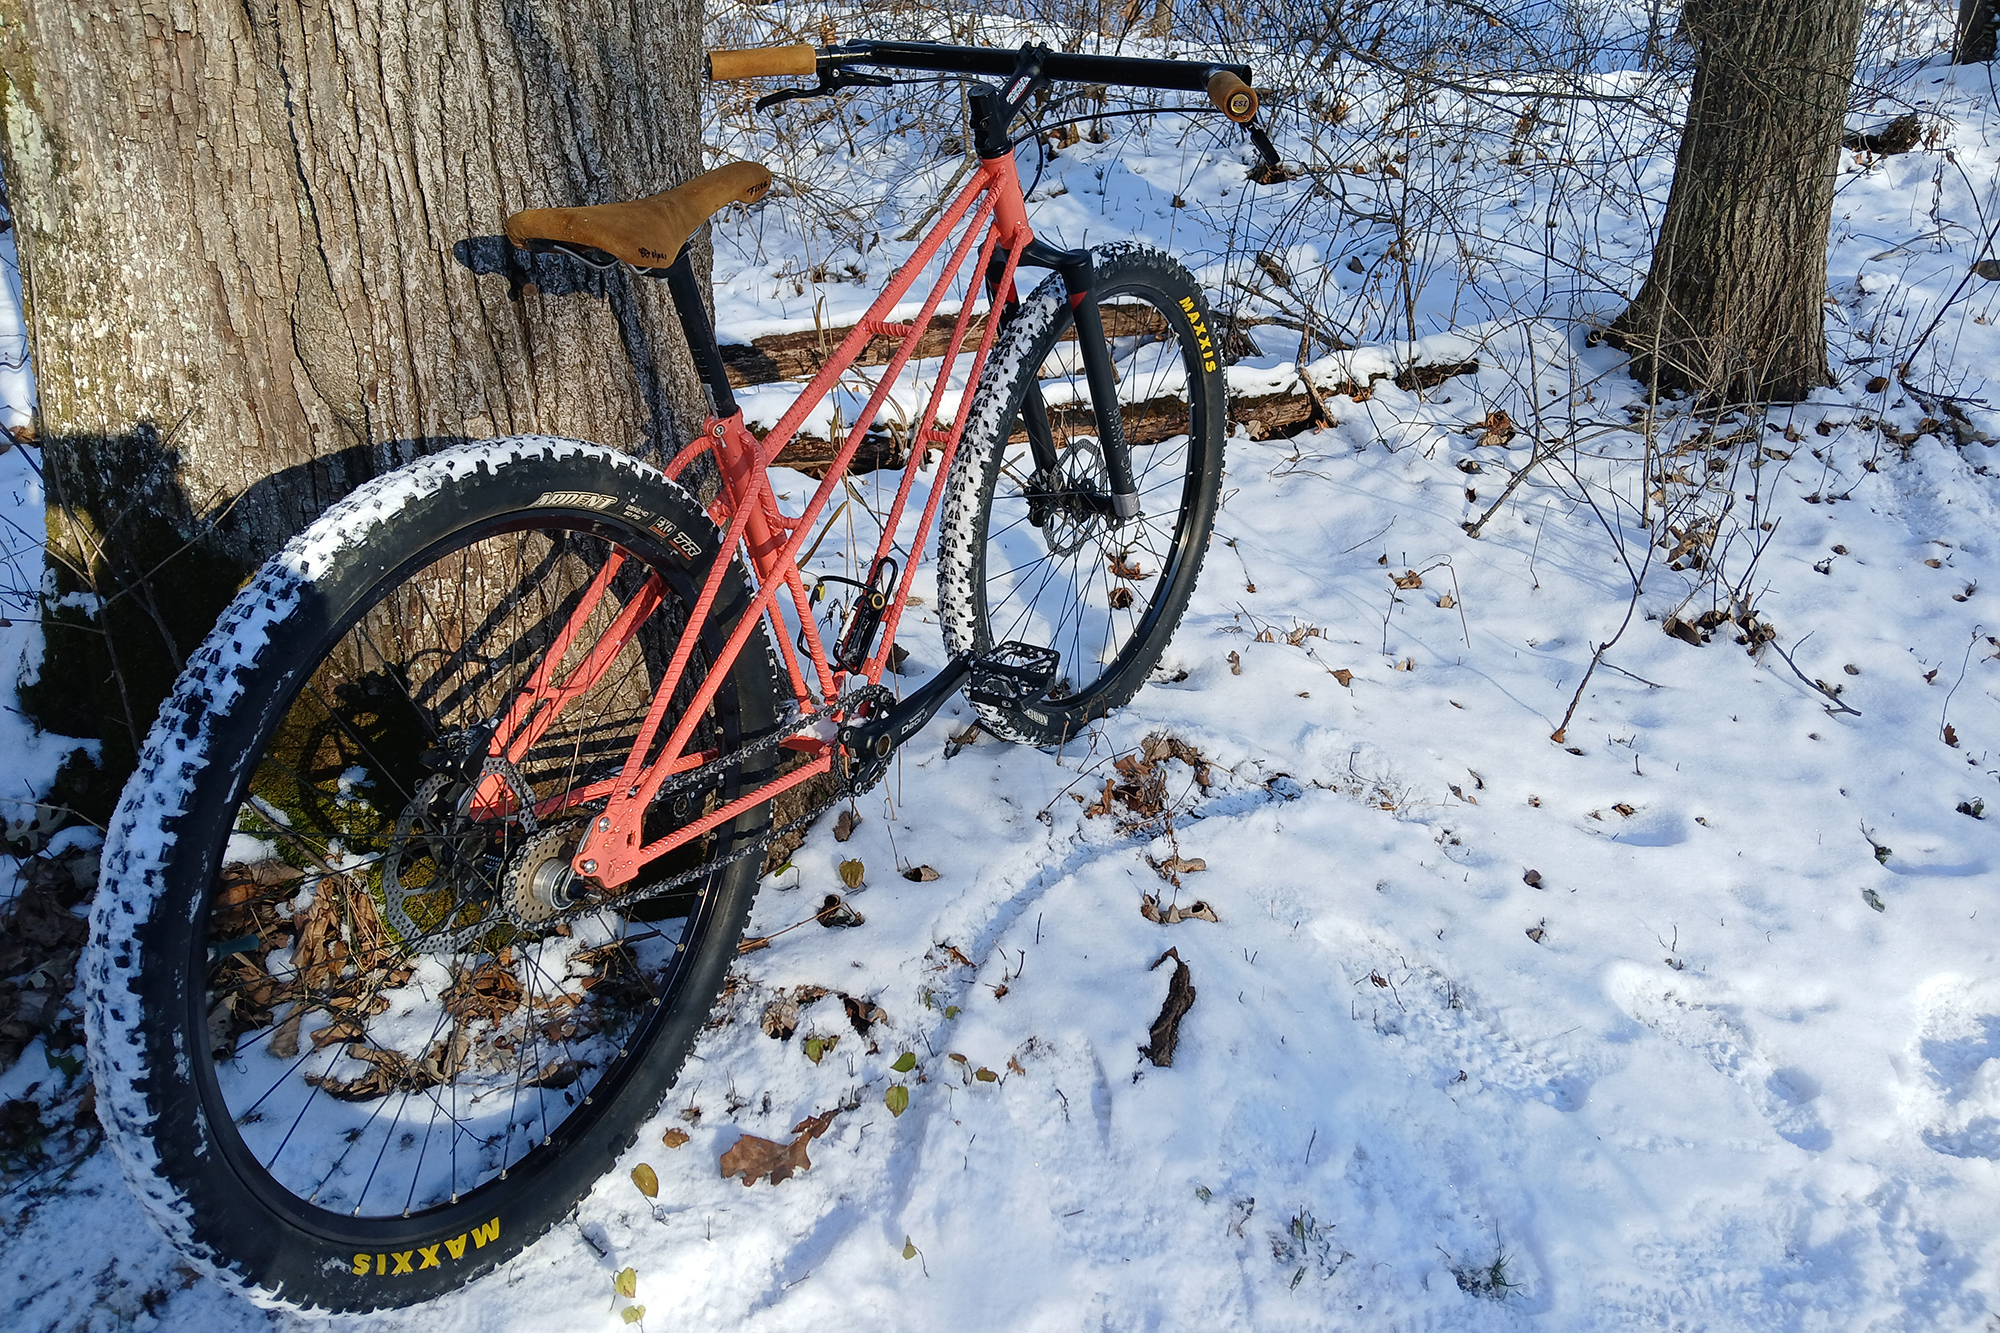
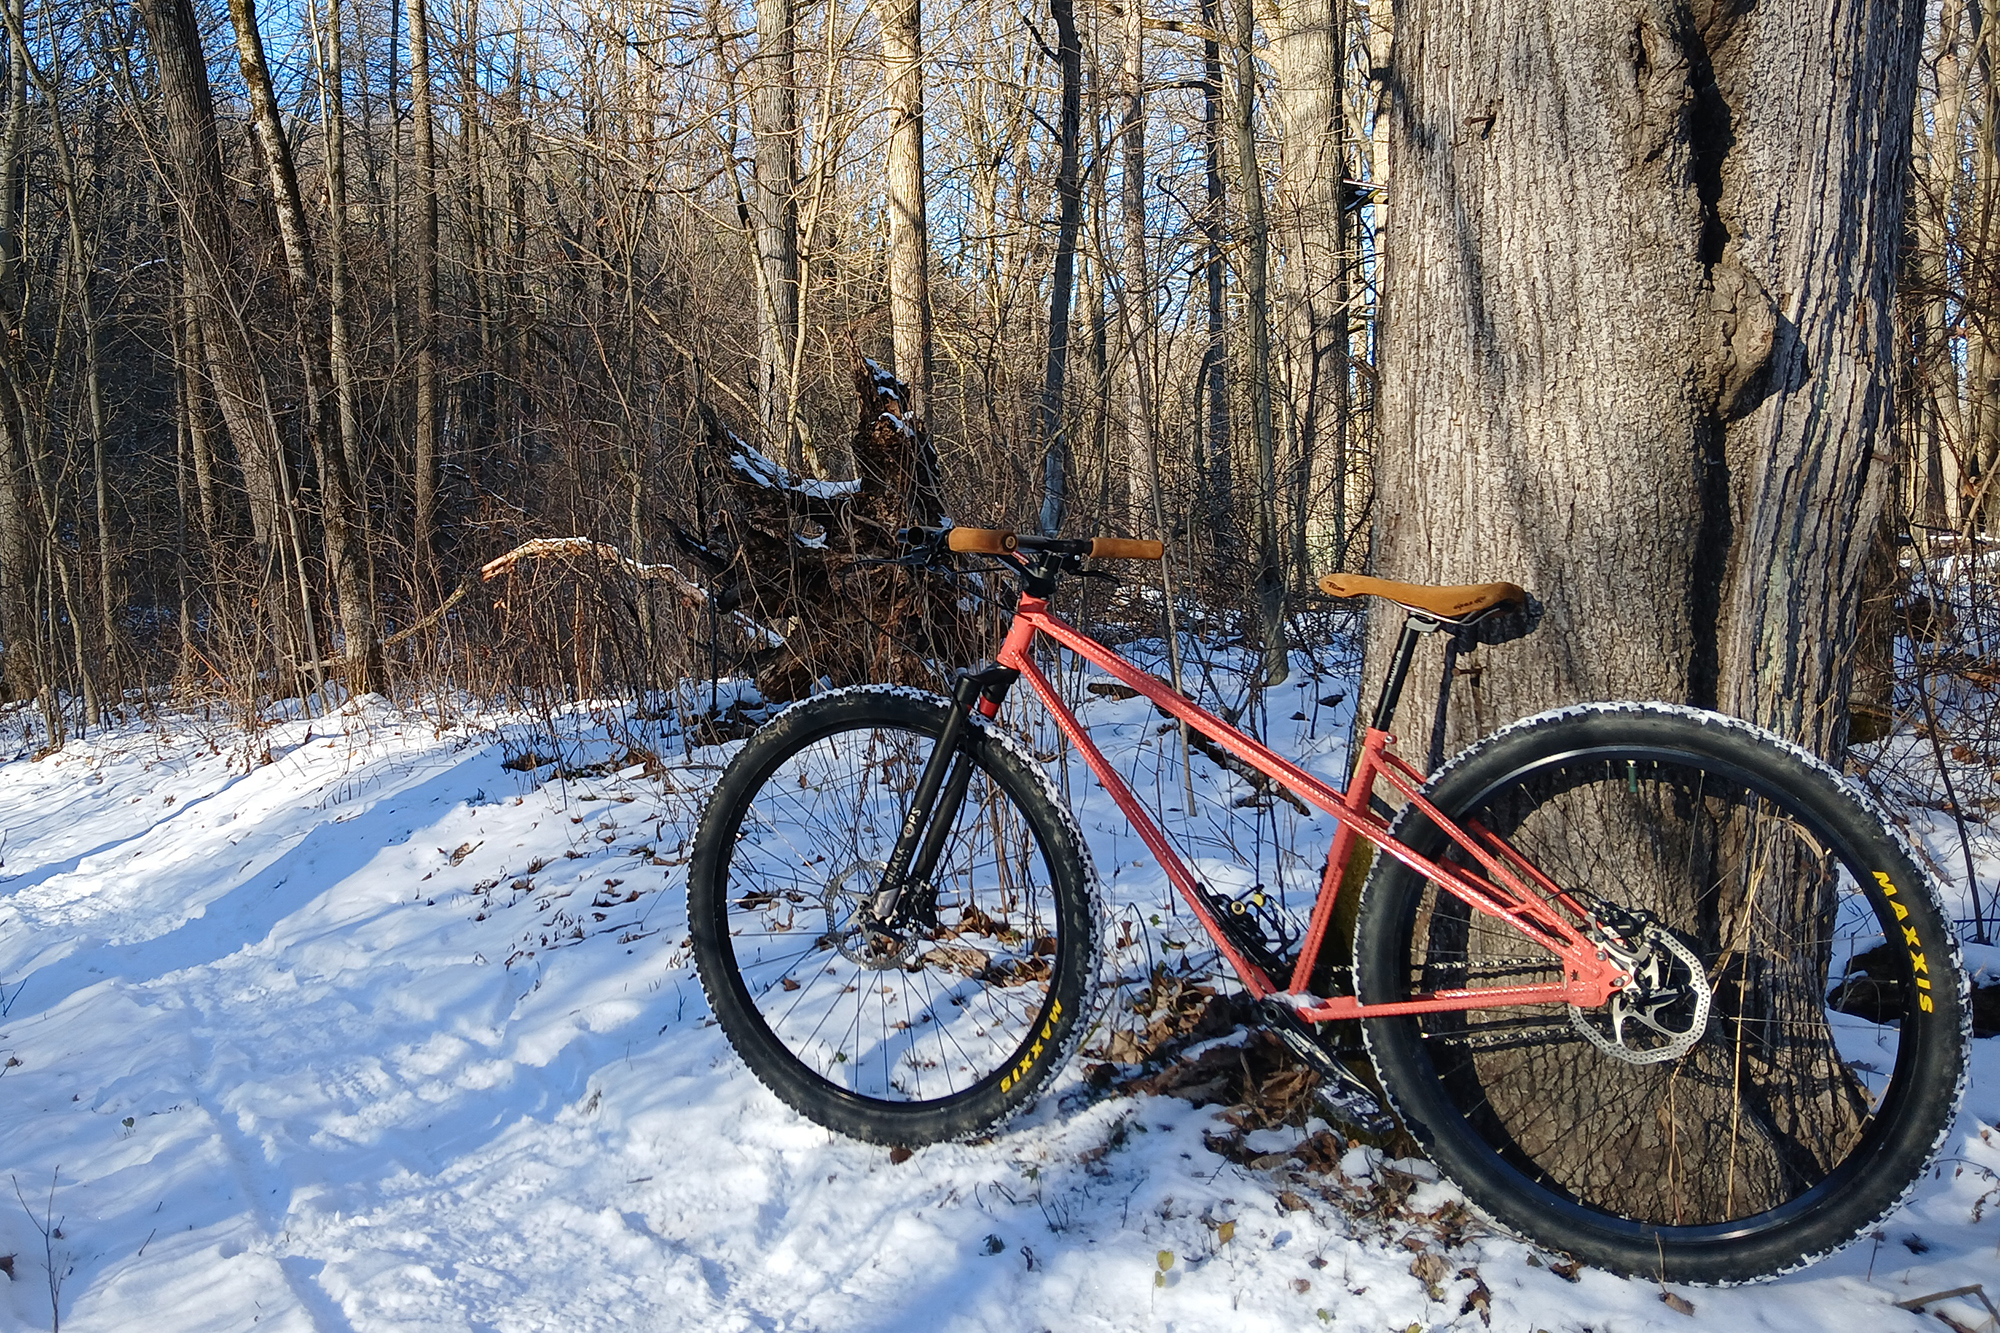
Now I know it’s awesome to see sweet eye candy on fresh new frame builds but I’m also a believer in using parts I already have or good used parts. Plus I’m a tightwad and broke so I dug into my stash or pulled from other two wheeled cadavers hanging from my rafters. Simplicity is a huge factor in my builds…no suspension, no derailleurs, no dropper, no thru axle, nothing wider than 135mm spacing. Call me an old dated curmudgeon stuck in the past but we have so many perfectly good parts already out there that people deem obsolete because they’re not of the latest and greatest. One man gathers what another man spills. The bars are my own custom pieces I called the “Go Pharr Bar”.
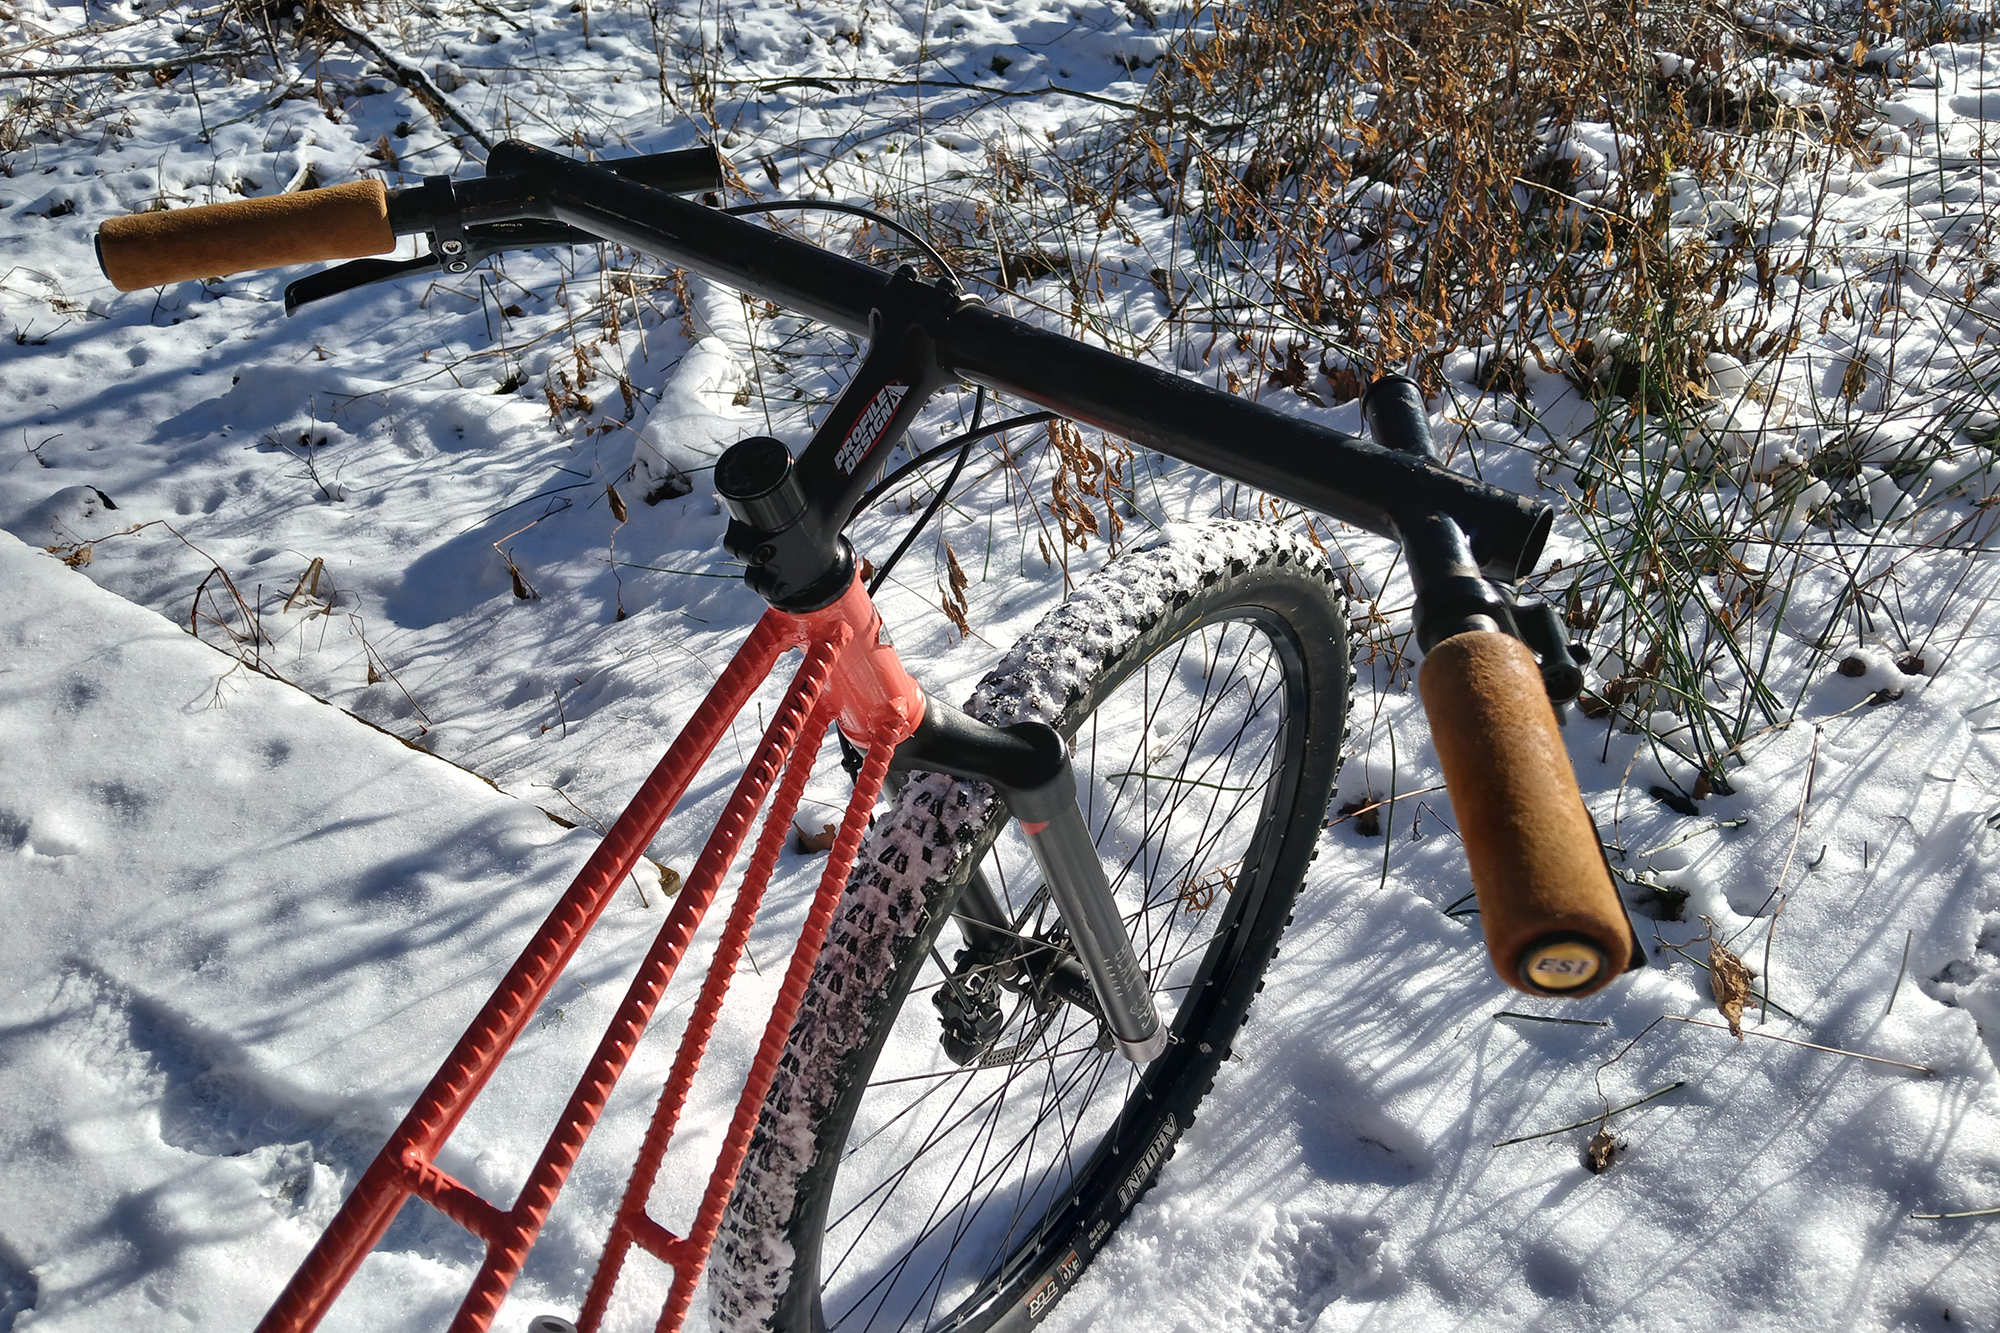
I made a small batch of these a couple of years ago and are my favorite comfort and size wise. All 4130 tubing and fillet brazed pierced thru tube construction. I figured if my fillets were to fail the handle section isn’t going to just snap off. Also because of the geometry of the bar you need to run those casted aside old school John Holmes long dong stems. The saddle and grips were fun mini projects to add another personal touch. The saddle is an older Ti railed Selle Flite Alpes I got in a trade recently. The grips are standard ESI grips but I had this piece of deerskin my mom gave me years ago to make moccasins I think. This stuff was super supple and flexible and the color is this amazing butterscotch on the suede side and a silky smooth blonde on the other. Ciao bella!
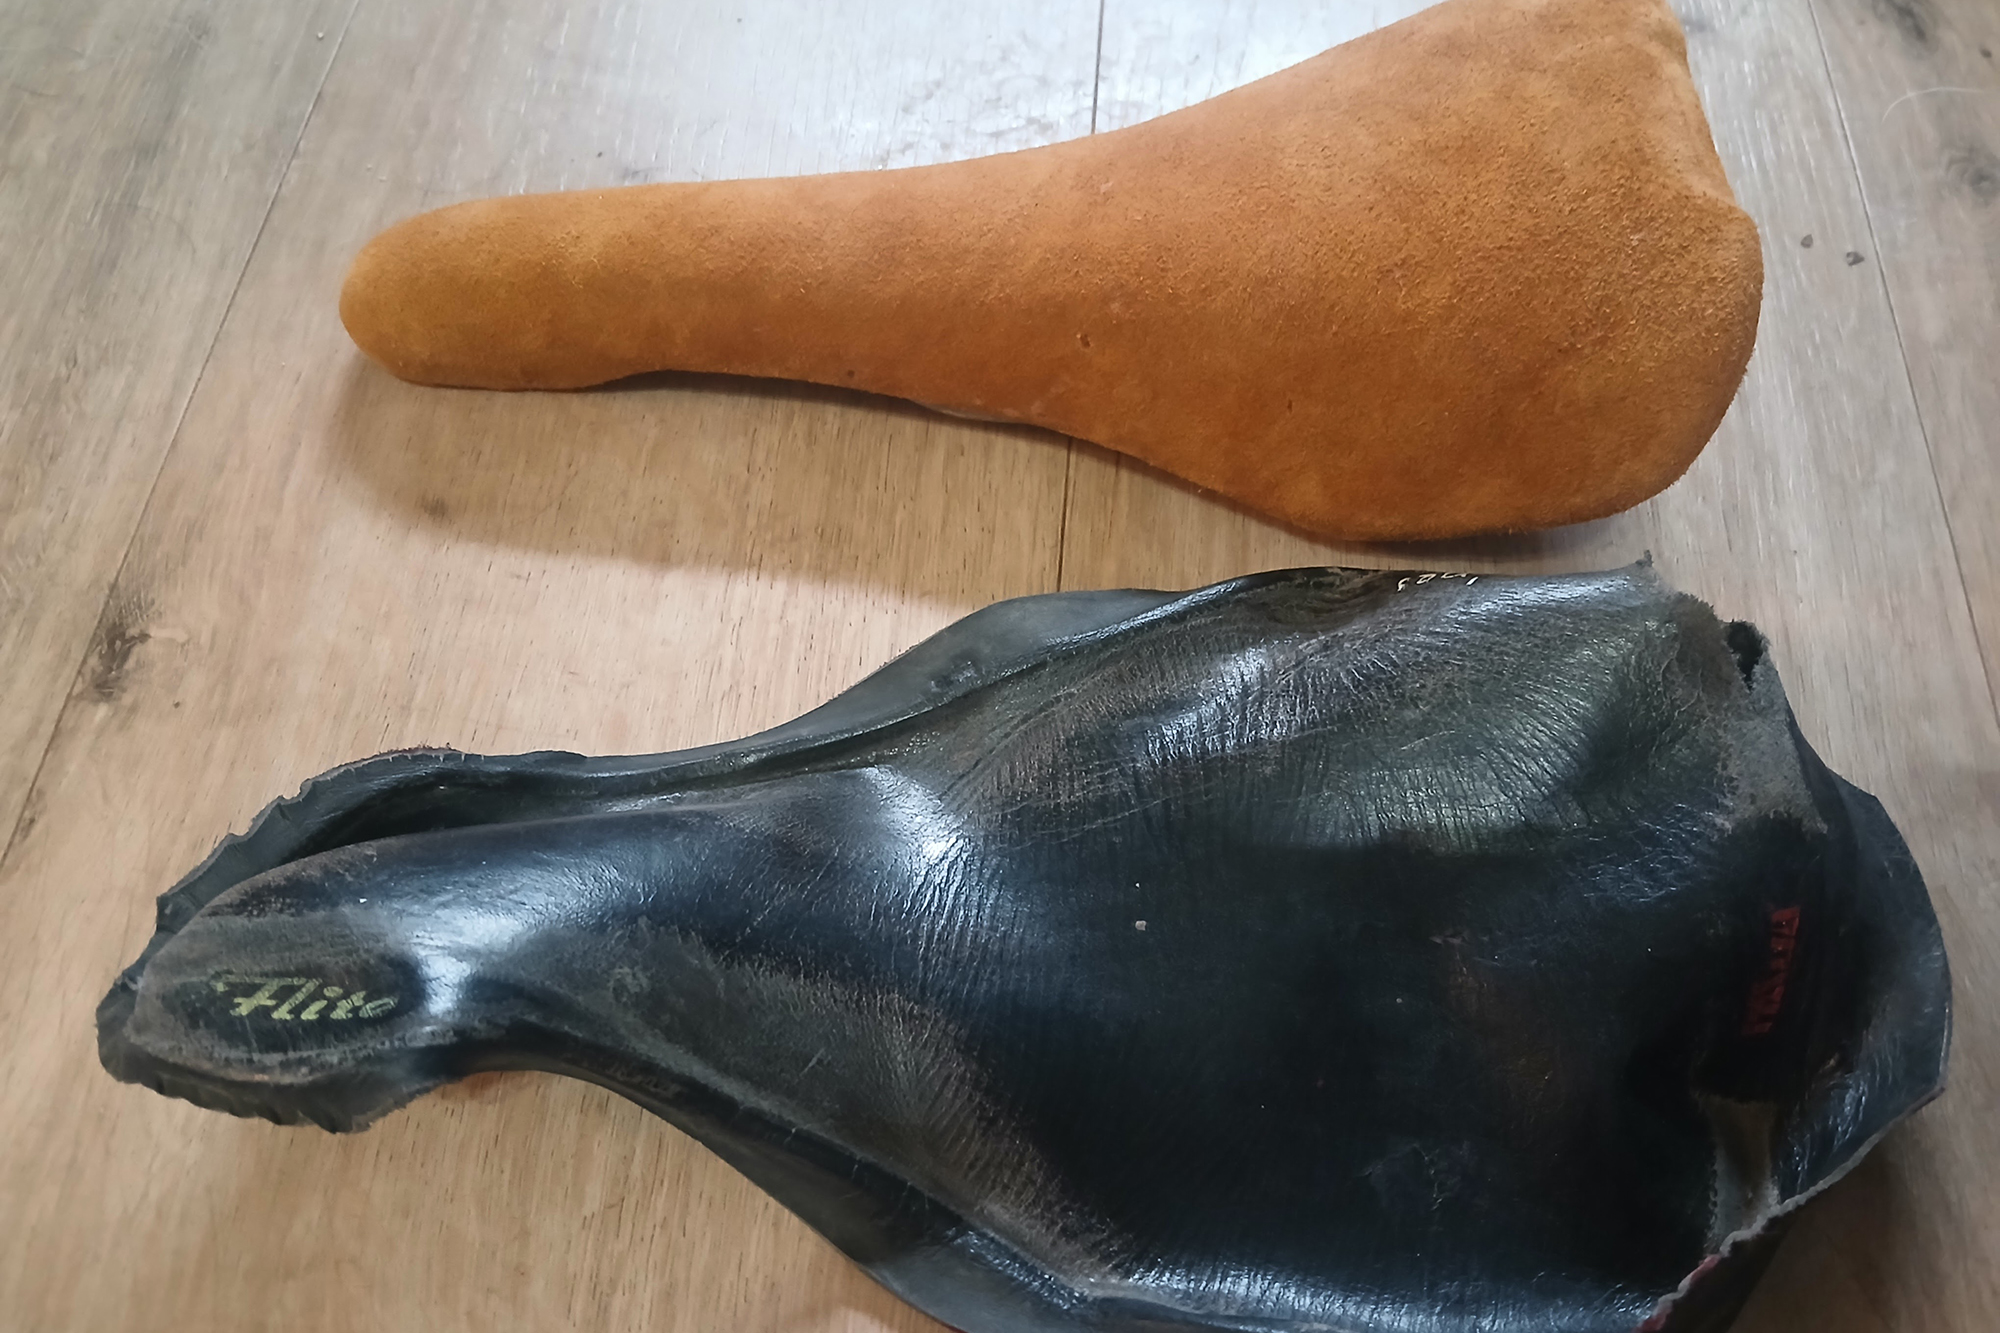
To add to the personal touch I added the Flite and Alpes font with a fine tip sharpie and my own wheeled terrapin logo. Now the curtains match the carpet! The build had some small setbacks. The donor frame was supposed to supply the integrated headtube but the stem hardware was stripped. So to avoid the hassle and downtime I just happened to have a new integrated headtube from my framebuilding stash intended for another build. Then the bottom bracket shell gave me the biggest headache because my tap/facing/reaming frame tool kit doesn’t have provisions for a mid shell setup. You only see Mid bottom bracket shells on BMX frames and thought it would be cool to have one on this build. I thought wrong.
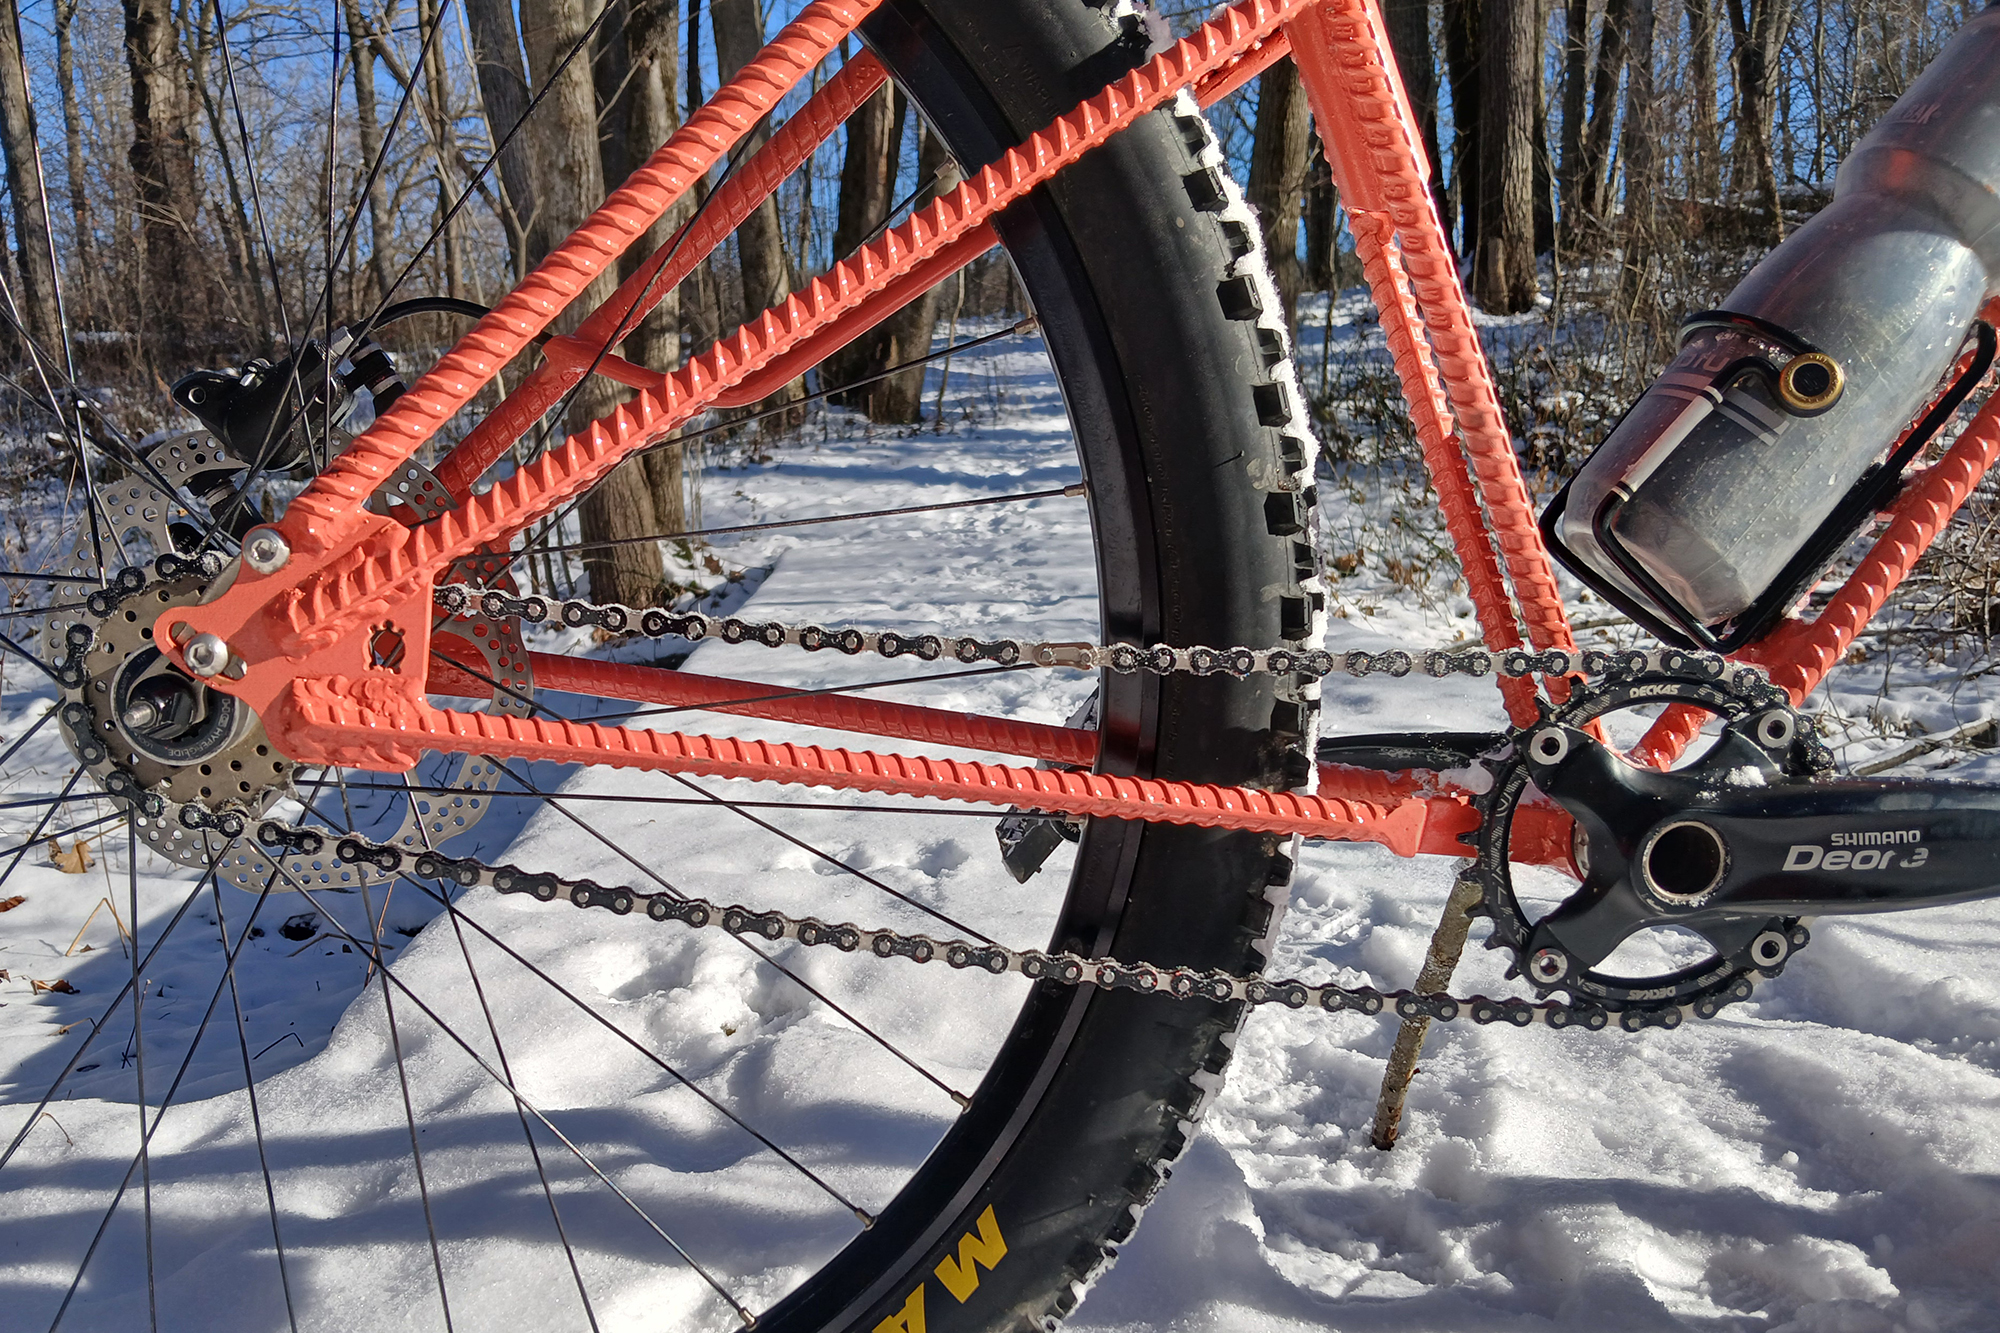
Once the frame was completely finished welding the shell was out of round and the bearing was so tight after being pressed it was pretty much seized. No bueno. I had no way to fix the now ovalised shell but when in doubt make lemonade with a standard 73mm BSA shell welded inside. Not the most ideal solution but it’s not an ideal build so who’s checking? To keep with the questionable choices of this frame. I also want the color to be equally questionably. I recently saw this meme where a human tells a Salmon who can somehow speak English they were making a color named after him.
Mr Salmon the English speaking fish goes:
“oh so it’s going to be a beautiful silvery blue color?” Despicable Human…
”uh, no.”
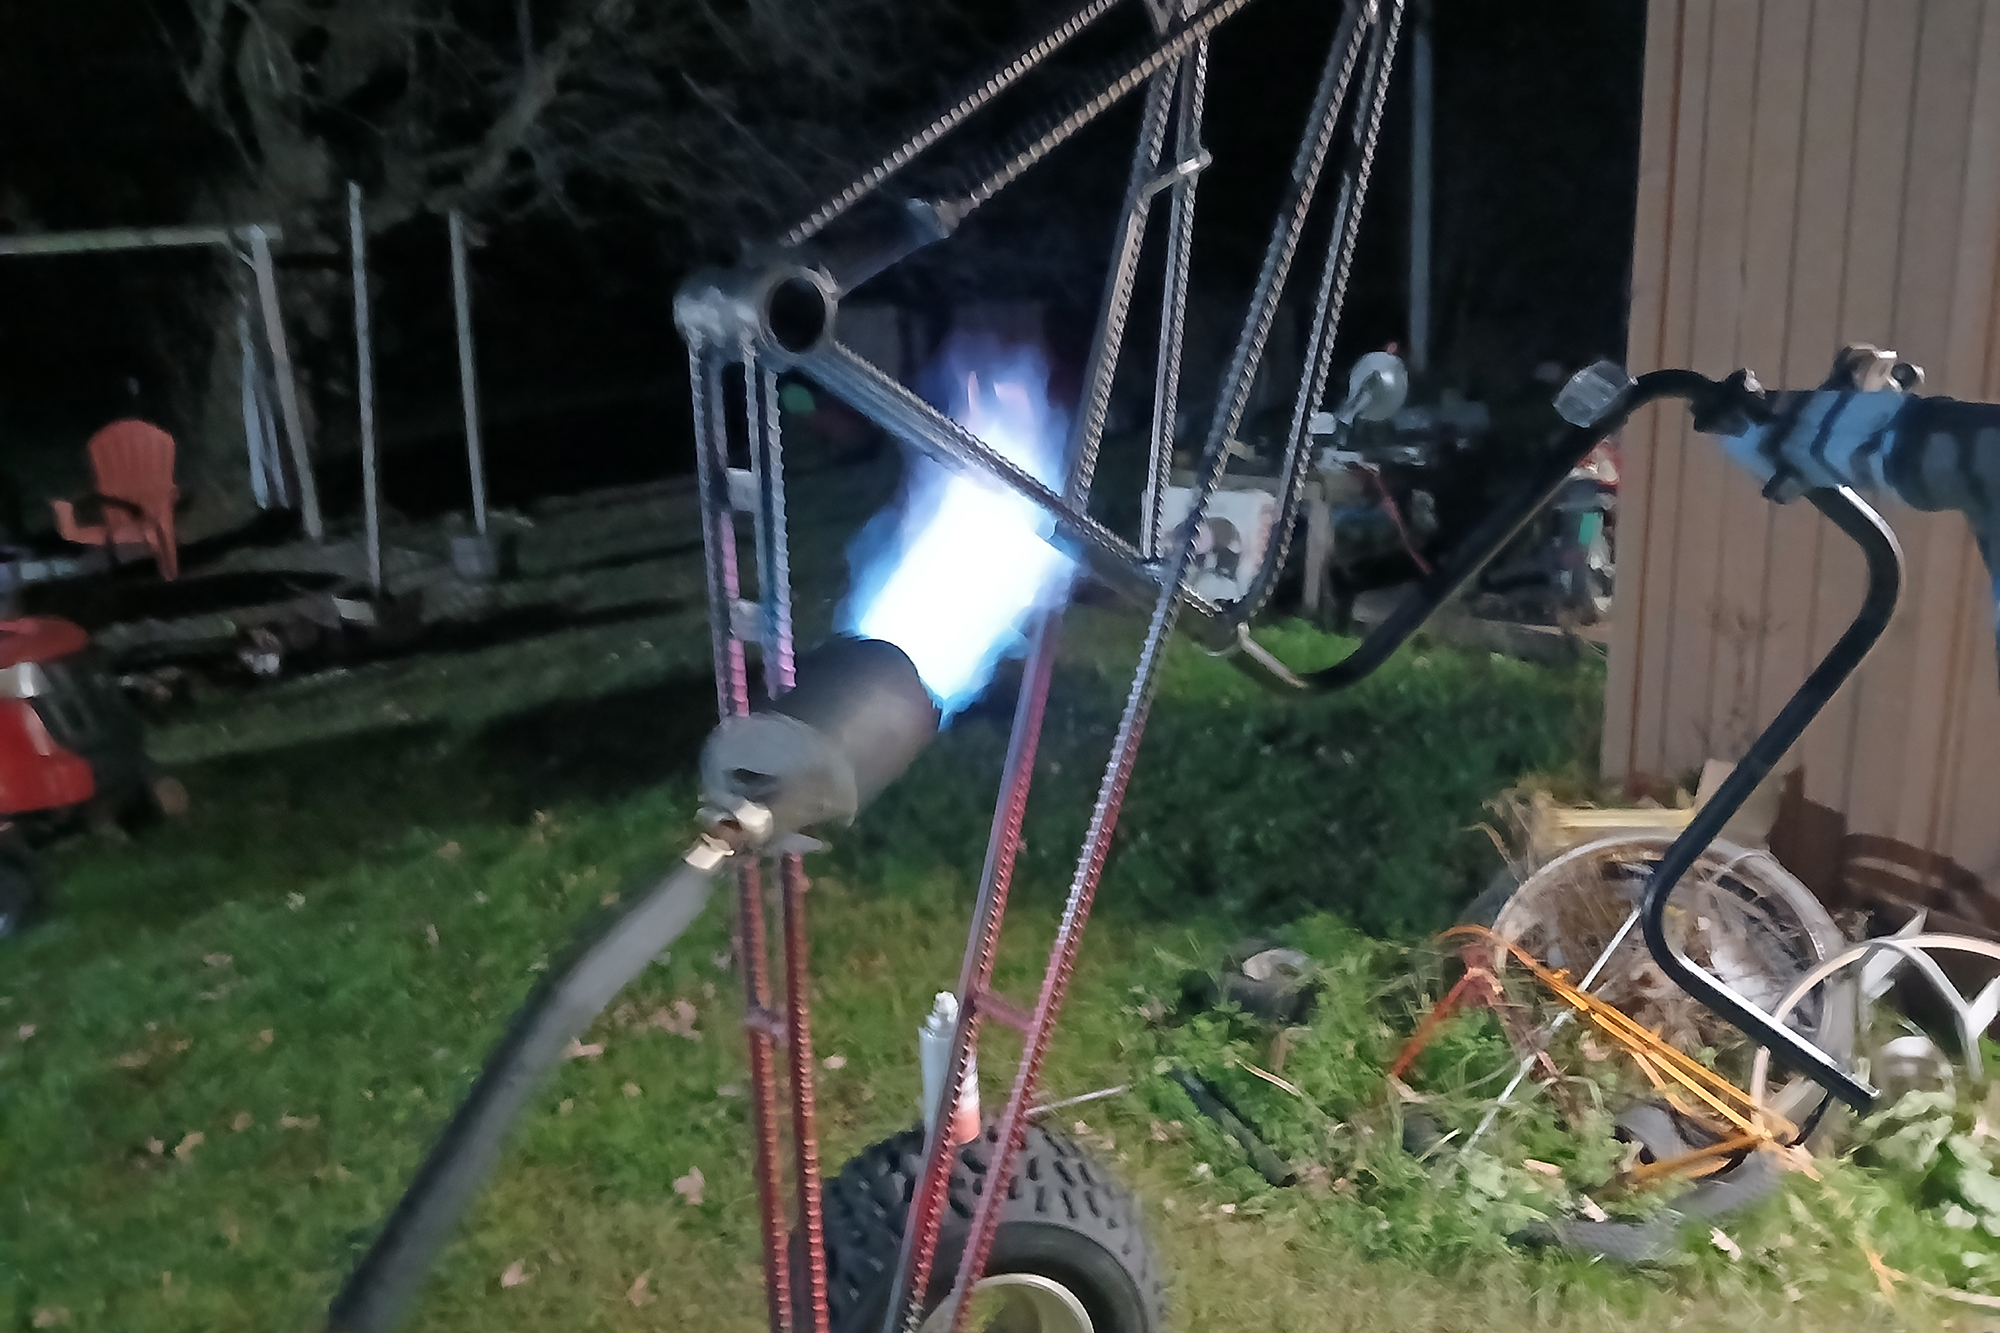
After being shown the color Mr Salmon then questions “why is it pink? WHY IS IT PINK?!” Brutal. A brutal build needs something equally comparable for paint. Keep in mind that I finished this frame in the middle of November in northern Michigan and was six degrees above freezing that night so not the most ideal painting weather. So I figure if I can’t make the surrounding air warm I’ll make the frame hot to hopefully flash dry the paint. I bust out my torch and get the frame hot but not glowing hot. Low and behold it worked great and was dry to the touch!
Onward and upward!
People may question why even build something that just the frame alone weighs 15 pounds or the questionable ride quality. I’m not huge on shock value, IG hits, seeing my bike on the Radavist…fine I was joking about the last part. No but really. I lay in bed so many nights and these hairball ideas run through my mind. Should any of these ideas be pursued beyond daydreams?
Probably not but that’s where things like the ReMixt are born. Trust me, looking at my builds I’m not taking the food from the mouths of any framebuilders any time soon.
I use what I have access to and what my budget allows. Is it the best choice of material to build a bicycle frame from? I sure hope not unless the Walking Dead becomes reality or you’re stranded in some fourth world country and need transportation. To say you built a home with your own two hands must be an absolutely amazing feeling. Something that can provide warmth and security from the elements.
Be it a conventional stick built or unconventional reclaimed materials you have at hand. The same with any form of human powered mode of transportation. Something that can transport you from one place to another under your own power is an indescribable feeling. You just created two wheeled freedom with your own two hands.
Terrapin Transportation Company
The old story of the tortoise versus the hare
Slow and steady wins the race
…If you don’t race you’re just slow and steady which isn’t always a bad thing!
So until the next build my friends
Miigwetch,
Henry
Build Spec:
- Frame The ReMixt (Rebar Mountain Mixte)
- Fork Origin8 Carbon Rigid 29’er
- Stem Profile 120 mm (John Holmes signature model)
- Bars Terrapin Trans Co “Go Pharr Bar”
- Grips Deerskin wrapped ESI grips
- Brakes Shimano MT200 w/ Avid 180 rotors
- Saddle Deerskin wrapped Ti Selle Flite Alpes (Terrapin Signature Model)
- Seatpost El Cheapo M-Wave 25.4
- Cranks Shimano Deore with 30t ring
- Wheels WTB Laserdisc Lite
- Rubber Maxxis Ardent 29×2.4
- Agua Cage Elite Ciussi
- Frame Specs (roughly a Smedium)
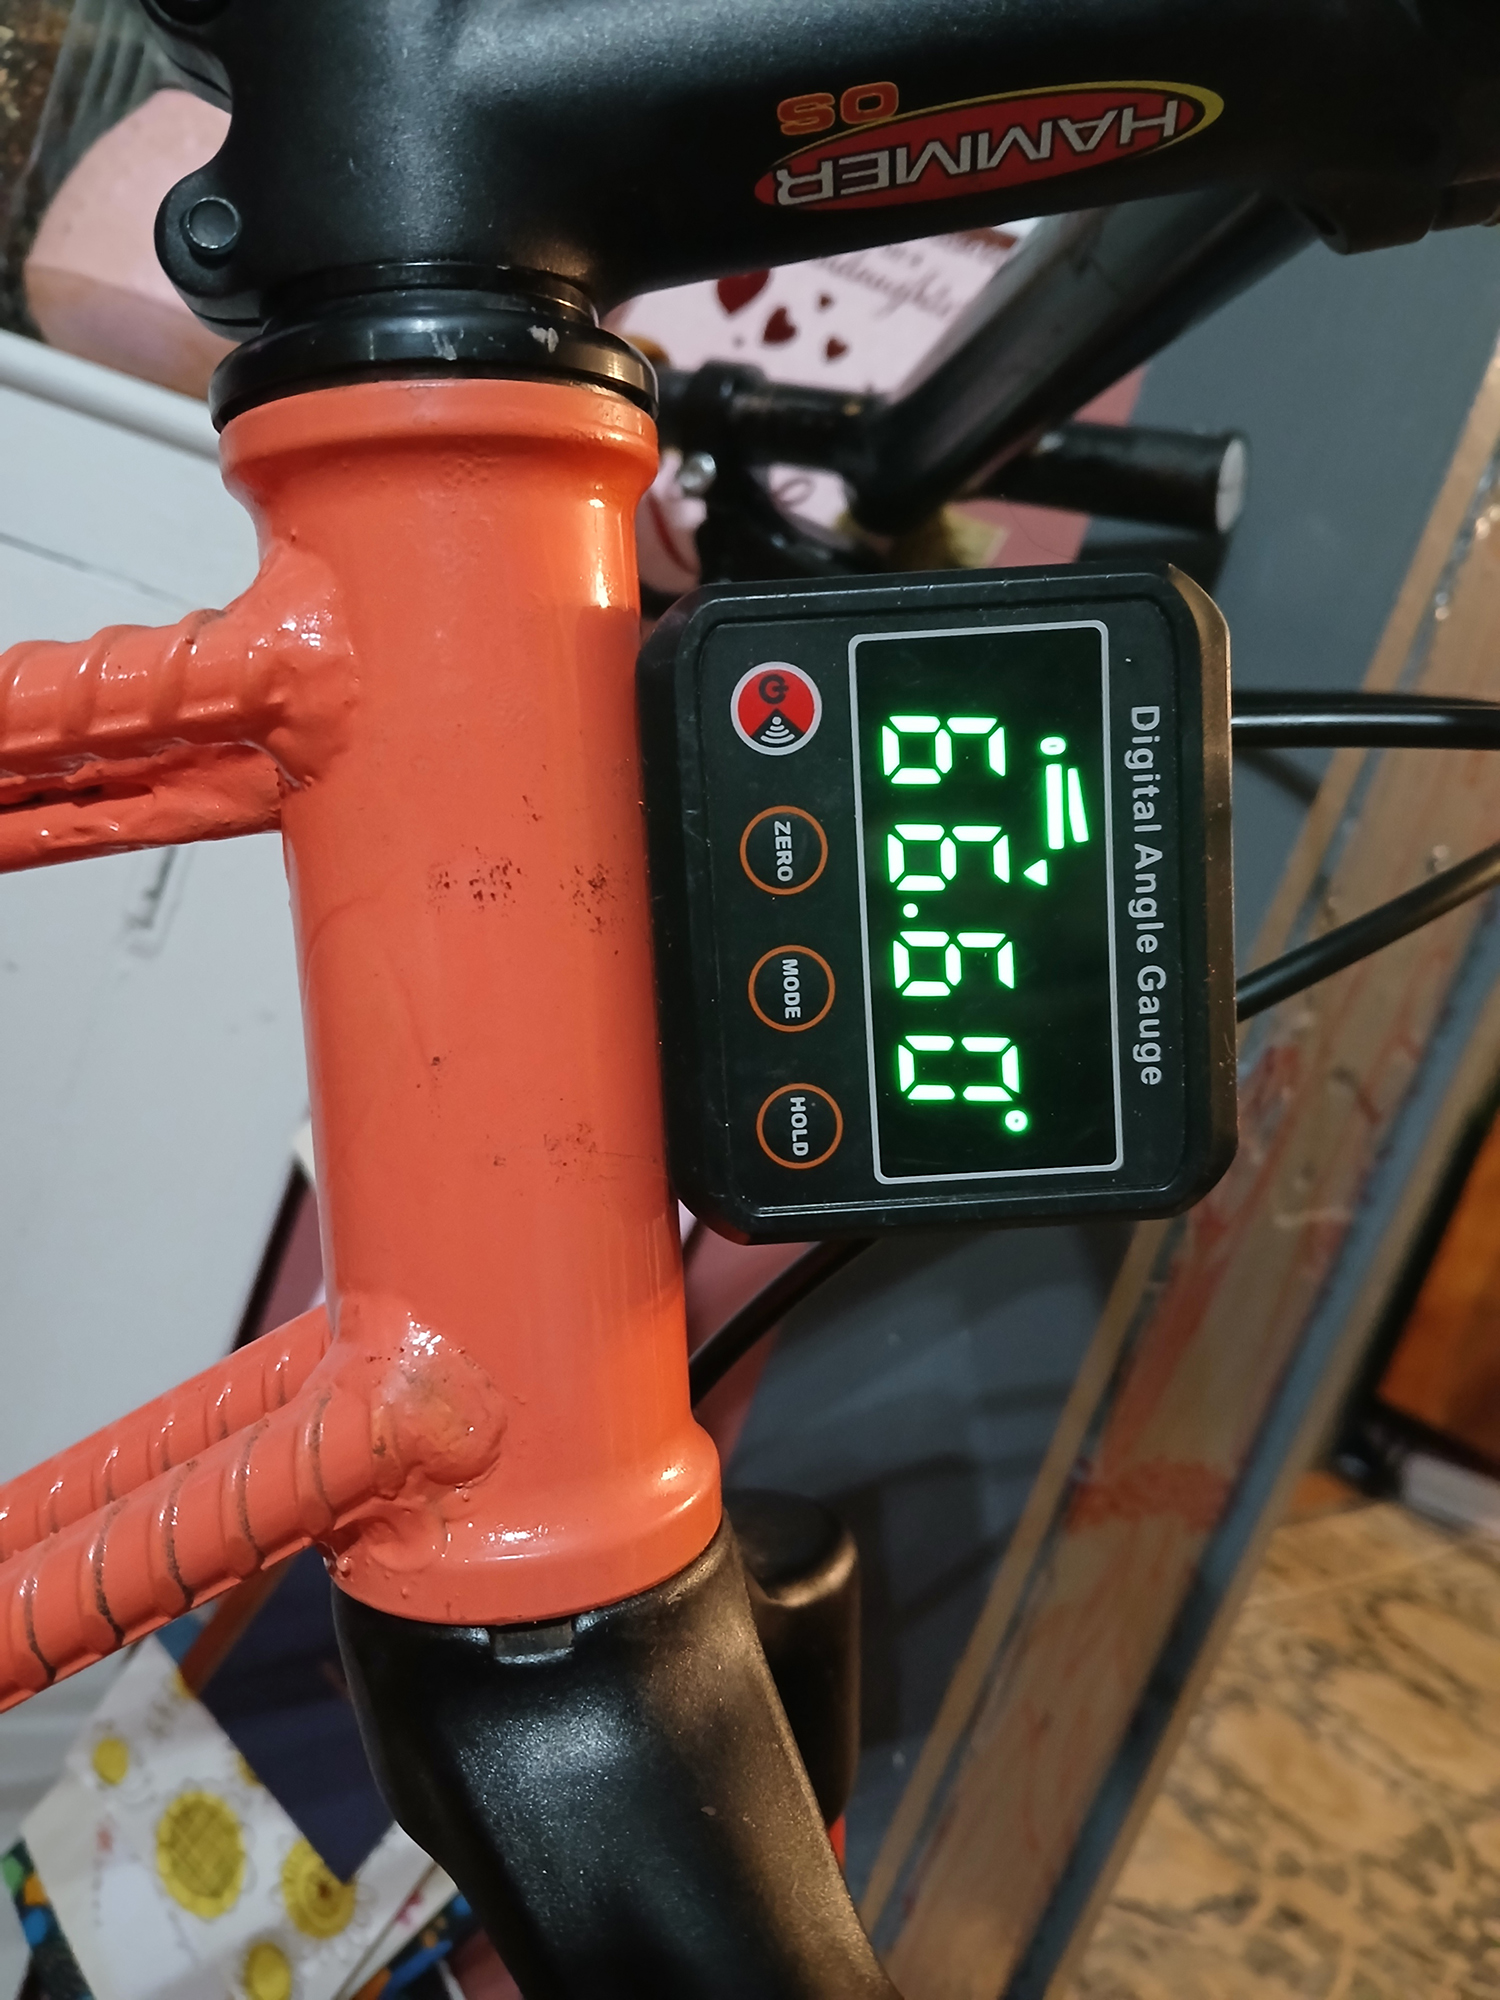
- Headtube 66.6 (Slackness of the Beast)
- Seat tube 71.3
- BB Drop 85mm
- BB Height 30cm
- Chainstay length 475 +/- 1cm
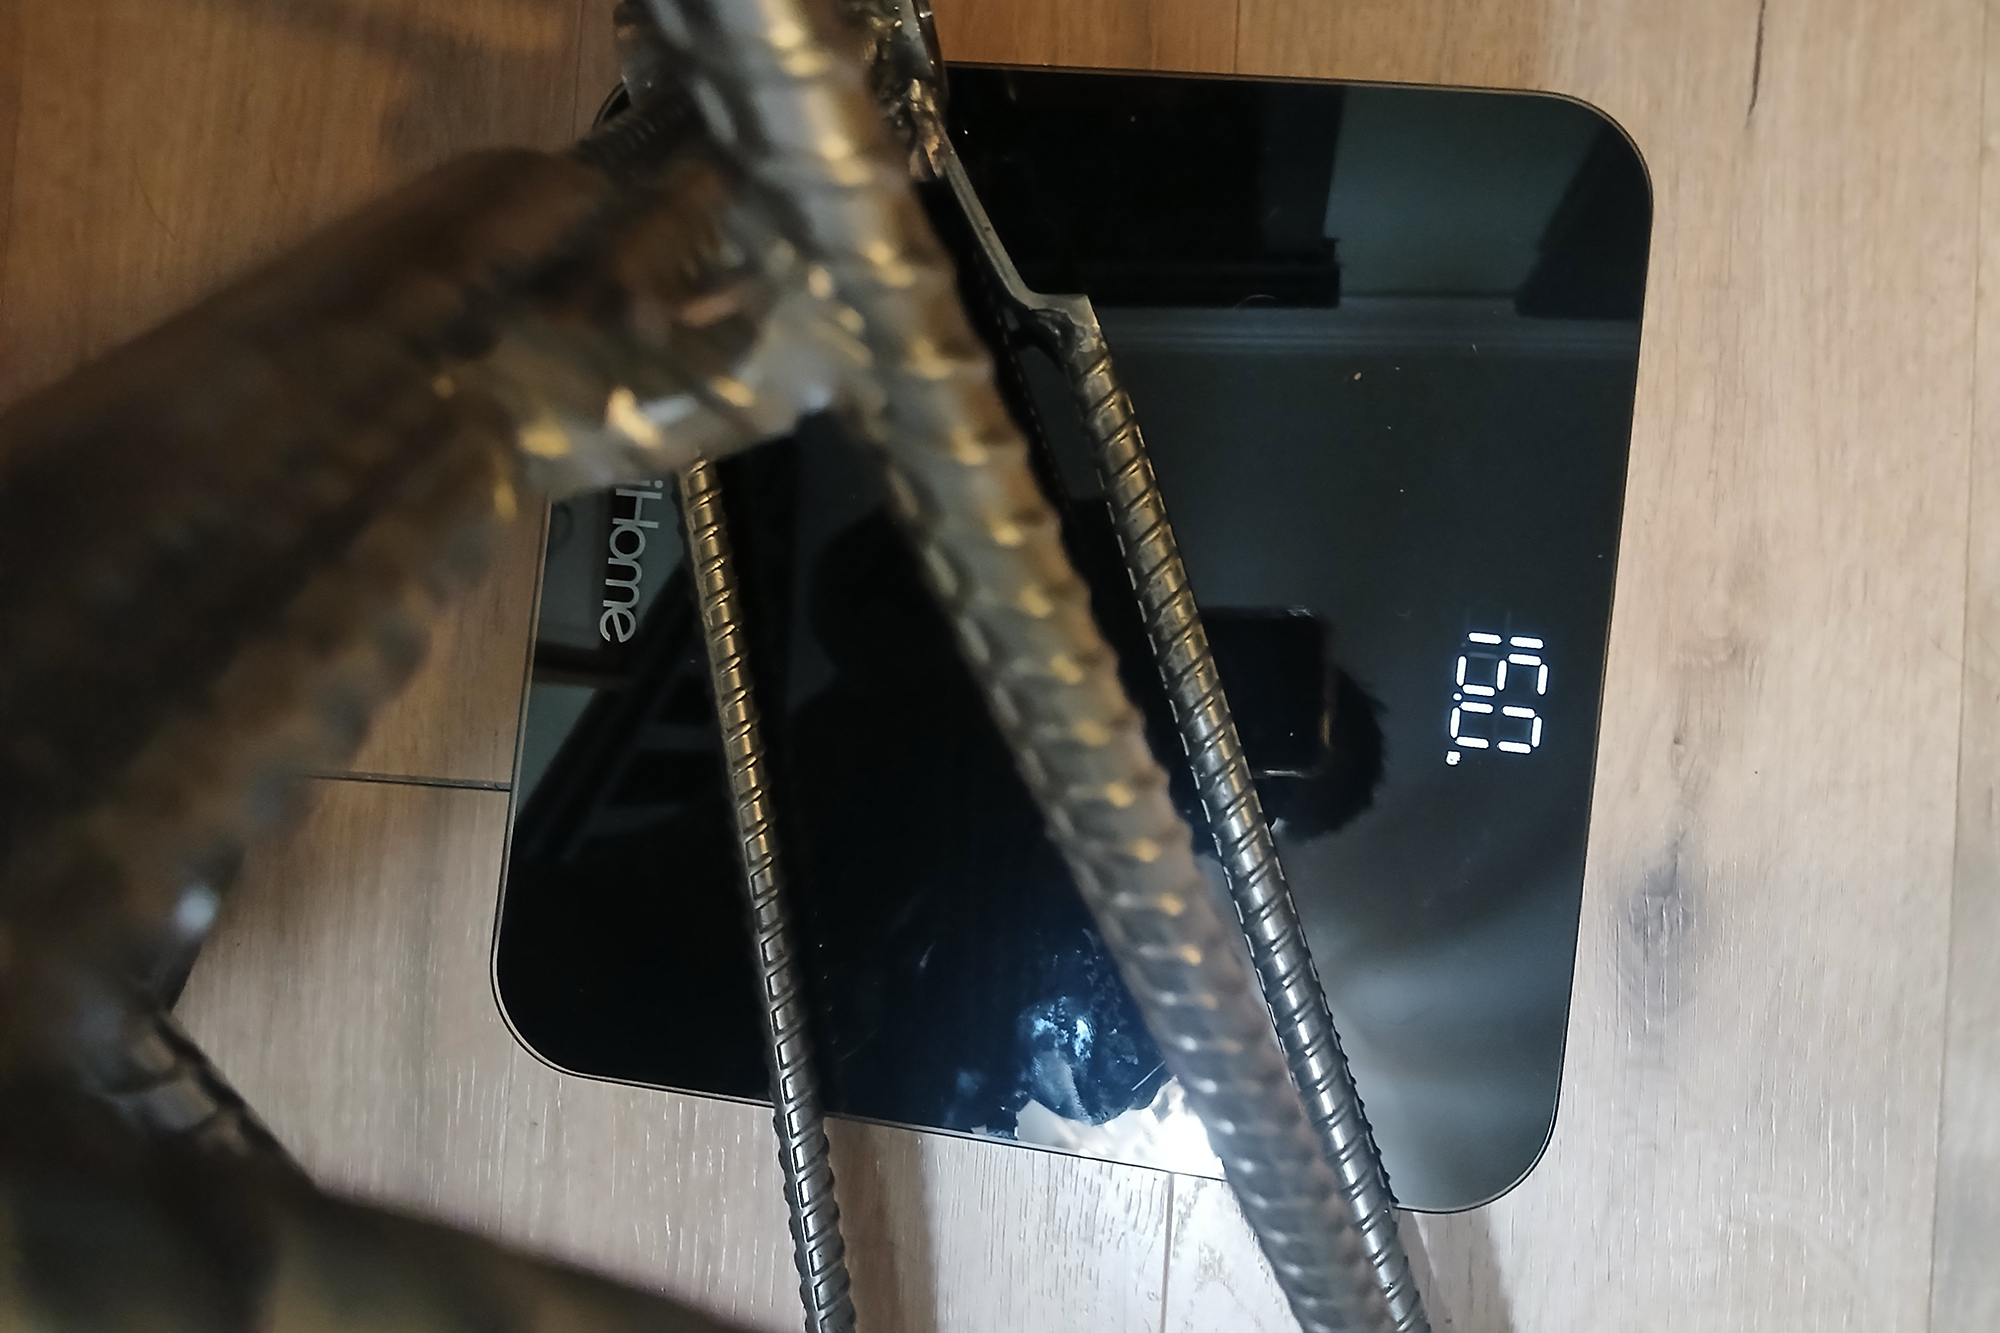
Total build weight, as shown in the pictures, is 38 pounds (17kg). It’s no featherweight but not morbidly obese despite using nineteen feet of #4 (½”) rebar.
We’d like to thank all of you who submitted Readers Rides builds to be shared here at The Radavist. The response has been incredible and we have so many to share over the next few months. Feel free to submit your bike, listing details, components, and other information. You can also include a portrait of yourself with your bike and your Instagram account! Please, shoot landscape-orientation photos, not portrait. Thanks!