
")
Take the guesswork out of MTB suspension tuning, get your MTB suspension feeling right the first time, and dial in your rear shock setup. From forks to shocks, here is our guide to mountain bike suspension adjustment. In this guide, we’ll tackle compression, rebound, sag, and more.
Sure, you could use ChatGPT or other AI chatbots to figure out MTB suspension tuning, or you could use this guide to actually get your suspension set up the right way. While learning modules and AI can give you a recommendation, what those settings actually translate to on the trail is going to be far less efficient than doing it yourself and understanding how your bike’s suspension works. From rear shock setup to fork pressures, volume spacers, compression, and rebound, I’ll go over the basics of mountain bike suspension adjustments and tuning so that you can get your bike feeling supple on the downhill, supportive on the uphills, and stellar all around.
MTB Suspension Setup Basics Explained
Some bike brands even have tools to help you get your suspension dialed out of the box. Norco and its Ride Aligned software do a lot of, if not all, the heavy lifting for you, and you can plug in your info, bike model, and ride style and the software will give you detailed setup instructions—it is Norco specific, though. Both Trek Bicycles, Specialized, and most brands with a robust line of full suspension bikes will offer similar tools, so I recommend checking the website of your bike manufacturer to get some help finding baseline settings.
But to do that, we need to go over the basics of suspension setup, and that means understanding what suspension sag is, what compression does, how rebound affects the ride, and what you can actually adjust on your fork and shock.
What Is Suspension Sag?
Sag is the amount by which your suspension compresses under just the rider’s weight on the bike. To set the sag, put on your standard riding gear and sit on the bike without touching the ground or the brakes. Most suspension forks and shocks have O-rings on the stanchions that show where the suspension is compressed when you get off the bike. The majority of bike brands recommend a 20%–30% sag setting, but it depends on the type of bike and riding style, and a brand’s recommendation might not be ideal for you.
Bruno Long
View the 2 images of this gallery on the
original article
Some forks and shocks might even have sag indicators on the stanchions, but if they don’t, you can measure the stroke of the shock or fork stanchion to find the percentage range. To do this, you can measure the overall length of the stroke (stanchion), sit on the bike to position the O-ring, and then measure the distance of the compression at the top of the O-ring and subtract that from the overall stroke to give you a sag percentage.
What Is High and Low-Speed Compression?
While most high-end forks and shocks offer both high- and low-speed compression adjustment, many lower-end forks have only one compression setting, or simply a lock and open position. Compression dampers affect how easily your suspension compresses under specific loads.
Deven McCoy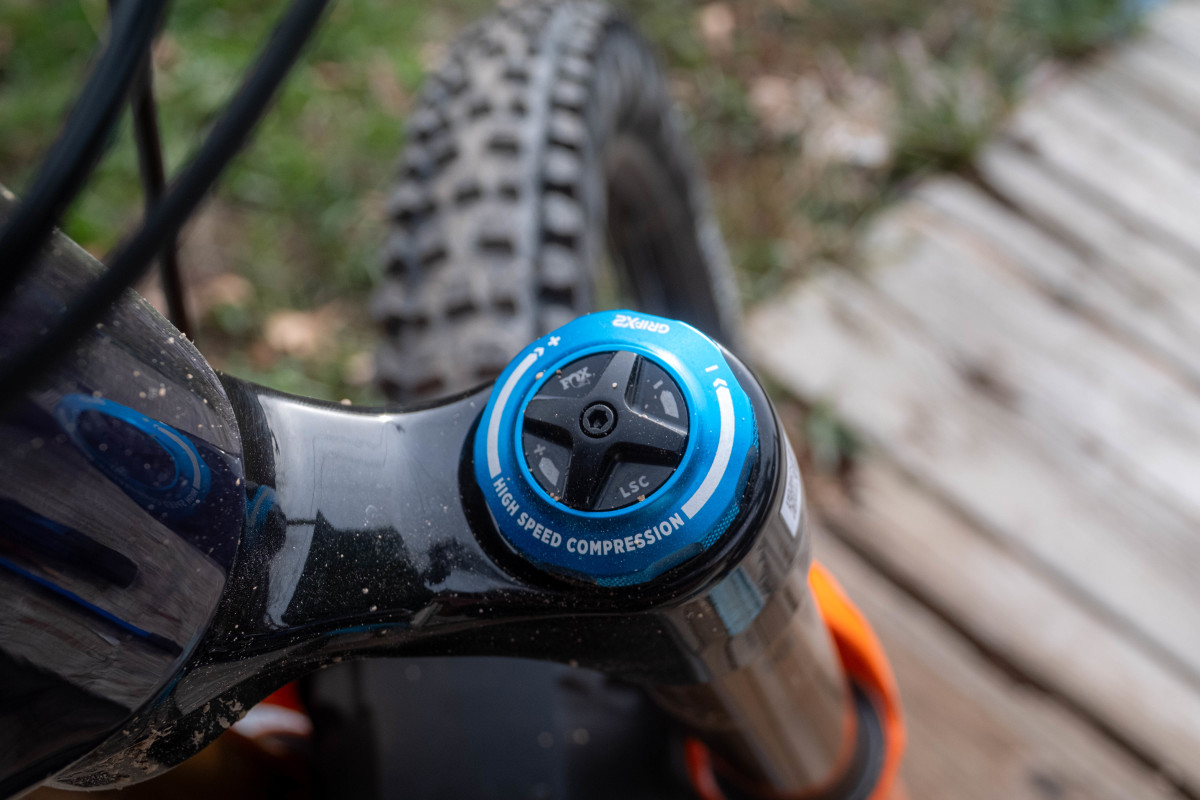
View the 2 images of this gallery on the
original article
- High-speed compression damping (HSC) controls how well the suspension reacts to high-speed impacts like trail chatter, drops, and corners. Think of high-speed compression as how the suspension reacts to trail input and factors other than you, the rider. More high-speed compression means stiffer suspension when dealing with trail changes at speed, and less high-speed compression means the suspension will feel more supple on chatter, landings, and square-edge hits.
- Low-speed compression damping (LSC) controls how the suspension reacts to rider input. Think pedaling, pumping, and leaning back and forth. Adding low-speed compression will reduce the bike’s bobbing under pedaling forces, when lifting the front wheel, and while climbing technical trails. While you might want to max out the low-speed compression, this can negatively affect how the suspension feels, so always play with these settings to find a happy medium.
What Is Rebound?
Rebound controls how quickly the shock or fork returns to its extension after a compression, and many experienced riders have their own preference depending on the trail and conditions. Having rebound that is too fast can make the bike feel like a pogo stick and harsher on fast trails, and too little rebound can make the bike feel stuck to the ground or sluggish in corners.
Deven McCoy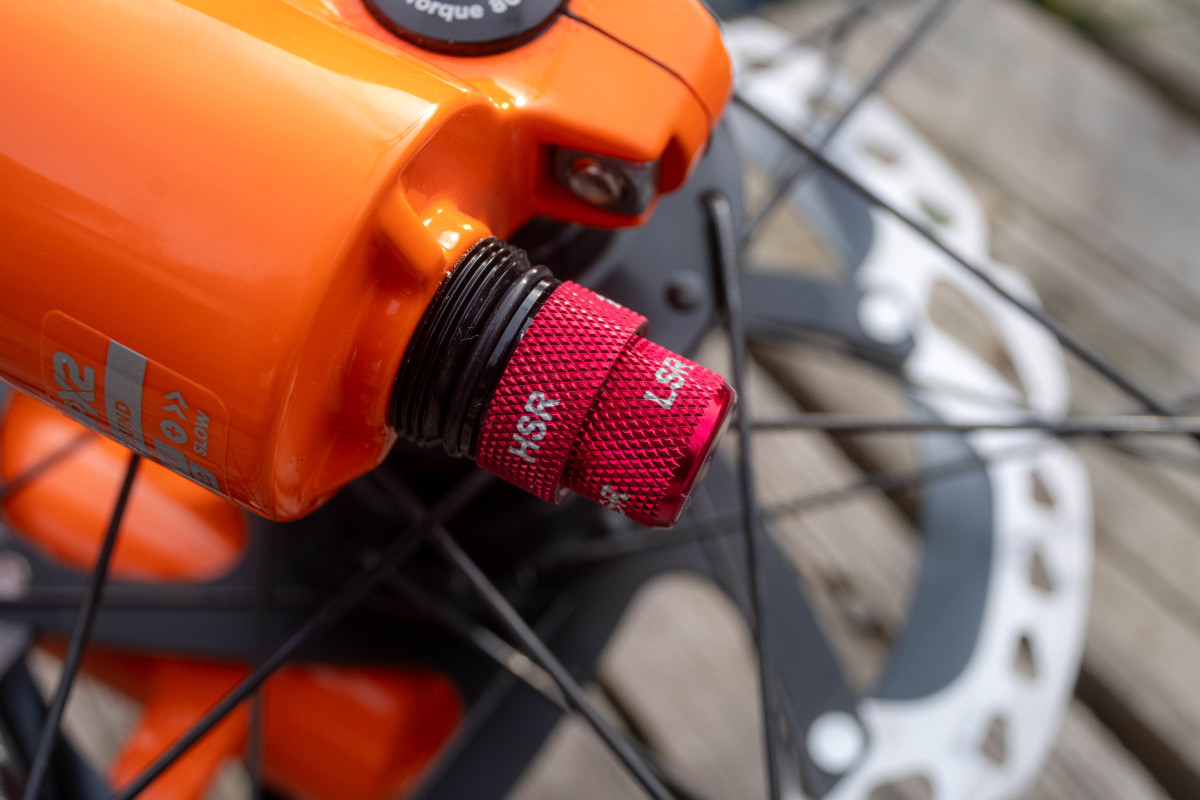
View the 2 images of this gallery on the
original article
Rebound is also something to play around with to find what works best for you and how you ride. Thankfully, most shocks and forks will have rebound recommendations that you can use as a starting point.
What Can You Adjust?
Not all forks and shocks are the same, and as I mentioned earlier, you might not have many adjustment dials on your suspension. Sometimes you will have just one compression adjustment dial and a rebound knob, so doing what you can with what you have is essential. Typically, getting sag and rebound perfect with air pressure is the only thing you can do to make the suspension feel good.
Deven McCoy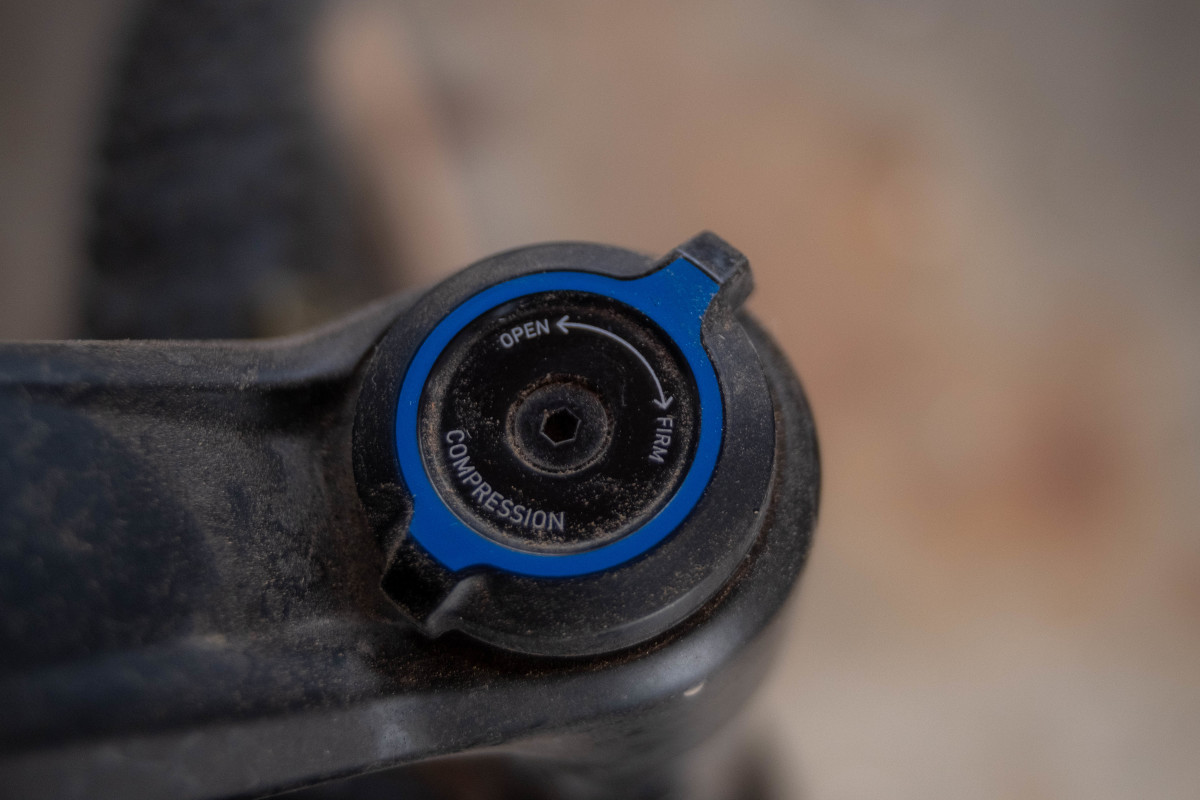
Air suspension is the most common on modern mountain bikes, but some models use a coil or a coil/air hybrid. In this case, coil springs are used to control settings such as sag and compression. Check which method your suspension uses, and if you have a coil, then most of what you can adjust will be done by swapping to a lighter or heavier spring.
Step 1: Set Sag
Reset your O-rings, put on your riding gear, and sit on the bike without bobbing. Try not to touch the brakes. After getting off the bike, check and measure where the O-rings sit on the stanchion and calculate the sag percentage. If there is too much sag, increase air pressure; if there is too little, reduce it.
Deven McCoy
View the 2 images of this gallery on the
original article
Add or remove air in 5-10 psi increments until you are within the recommended sag range. Ride the bike, and see if you like how it feels. One thing to note is that if you are setting up suspension for the first time, and your shock or fork has no air in it already or is brand new from the factory, when adding air, you should compress the shock or fork every 15 to 20 psi to equalize the positive and negative chambers. Not equalizing the fork or shock can result in a fork or shock that is way too soft, even if you are at the recommended pressure.
You should always write down and document the pressures you have in your fork and shock to help with further tuning.
Deven McCoy
Step 2: Damper Adjustments
To get the damper setting perfect, most suspension manufacturers will have a recommended setting on the fork or on their website to aid suspension setup. This is less common with shocks, so always check the manufacturer’s website for a baseline setting. After that baseline is achieved, you can ride the bike and start bracketing to find the ideal damper settings.
Deven McCoy
Bracketing is as simple as finding a baseline, moving the adjustment knob in one direction or the other to see how it feels, then moving it back one click in the opposite direction. Bracketing takes a lot of trial and error, but it’s the best way to figure out your ideal settings. This can be repeated with the high-speed and low-speed compression until you find the perfect settings.
If you don’t have all the adjustments on your fork or shock for HSC and LSC, keep the fork or shock locked when climbing, and don’t forget to open it when you go back down.
Deven McCoy![]()
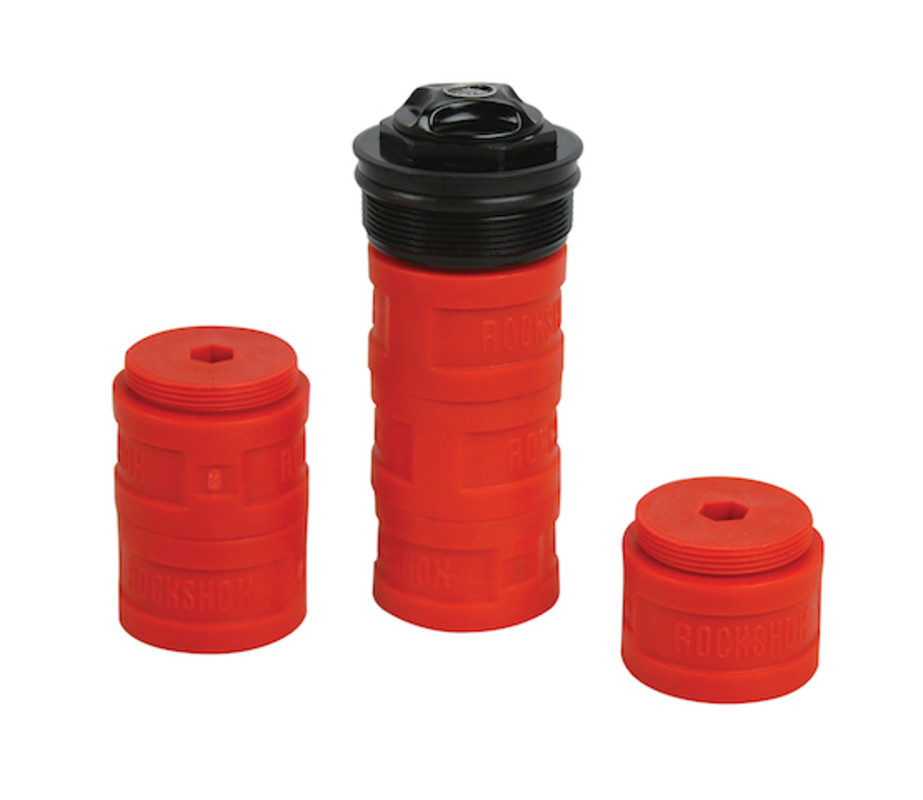
Step 3: Air Volume Spacers
Adding and removing volume spacers can make all the difference with how your suspension feels, but it can also be daunting and confusing at first. But it’s actually pretty simple. Adding volume spacers reduces the volume of the fork or shock’s air chamber, meaning that as the suspension compresses, the air has less room to expand, resulting in a firmer feeling suspension deeper in the travel. If you are a heavier rider or do a lot of jumping with deep compressions, adding volume reducers will help you bottom out less and have a more supportive suspension platform. This is what is referred to as making the suspension more progressive.
View the 2 images of this gallery on the
original article
If you are a lighter rider and feel your suspension is too firm, but you have the sag and all other settings correctly set, check for air-volume spacers in your shock or fork. Removing these will make the suspension less progressive and feel more supple throughout the travel. This is what is known as making the suspension more linear.
Adding and removing volume spacers requires removing the air from the suspension and opening up the air chamber. This can be a daunting task for most riders, and if you aren’t comfortable doing this or don’t have the right tools, head to your local bike shop and get help from the experts.
Deven McCoy
Step 4: Go Ride!
Setting up MTB suspension perfectly takes a lot of trial and error, and even the pros are constantly playing around with settings, so don’t get discouraged if you don’t nail it the first go. The best way to dial it all in is to ride, experiment, and tinker. Get your baseline figured out, go ride with a shock pump and the required tools, and play around with settings on a familiar section of trail.
David Bontrager
Bracketing, writing down pressures, and really paying attention to how your suspension behaves are key to understanding what you want from your suspension. Not all setups are the same, and it can be a very personal preference when it comes to compression, rebound, and air volume.
The more you ride and pay attention to how your bike feels, the better you’ll get at tuning suspension, but don’t forget that tire pressure can also have a HUGE impact on how the bike feels on the trail, so play around with that factor a bit before you blame it all on the fork and shock!